반응형
이 글의 동영상 강의입니다.
https://youtu.be/7mpiKHkkVD4

요즘 가장 많이 사용하는 Data Type인 JSON에 대해 알아보고 실습을 진행합니다.
* 이 문서는 Mozilla의 MDN 사이트의 내용을 참고하여 작성하였습니다.
https://developer.mozilla.org/ko/docs/Learn/JavaScript/Objects/JSON
JSON은 JavaScript Object Notation 의 약어입니다.
JSON의 특징
- JSON은 문자열 형태로 만들어집니다.
- 따라서 네트워크로 전송할 때 유용합니다. (객체 직렬화가 가능하기 때문)
- JSON의 데이터에 Access하기 위해서는 문자열 형태를 JSON 객체로 변환해야 합니다.
- Javascript에서는 기본적으로 JSON과 문자열의 상호 변환을 지원합니다.
JSON의 구조
- JSON은 {} 로 감싸여 있는 구조를 갖고 있습니다.
- 내부 데이터는 "Key : Value"의 형태로 구성되어 있습니다.
- Key는 "name"로 만들어진 문자열을 사용함. 예) "id", "password"등
- Value는 Javascript의 type 즉, 문자열, 숫자, 배열, Boolean등을 사용할 수 있습니다.
- 아래는 예제 프로그램에서 사용할 샘플 JSON입니다.
{
  "squadName": "Super hero squad",
  "homeTown": "Metro City",
  "formed": 2016,
  "secretBase": "Super tower",
  "active": true,
  "members": [
    {
      "name": "Molecule Man",
      "age": 29,
      "secretIdentity": "Dan Jukes",
      "powers": [
        "Radiation resistance",
        "Turning tiny",
        "Radiation blast"
      ]
    },
    {
      "name": "Madame Uppercut",
      "age": 39,
      "secretIdentity": "Jane Wilson",
      "powers": [
        "Million tonne punch",
        "Damage resistance",
        "Superhuman reflexes"
      ]
    },
    {
      "name": "Eternal Flame",
      "age": 1000000,
      "secretIdentity": "Unknown",
      "powers": [
        "Immortality",
        "Heat Immunity",
        "Inferno",
        "Teleportation",
        "Interdimensional travel"
      ]
    }
  ]
}
JSON Data에 접근하는 방법
- Javascript에서는 아래와 같이 JSON 객체로 선언하면 사용이 가능합니다.
(실무에서는 RESTAPI등을 호출하여 JSON 데이터를 가져오는 형태로 많이 사용합니다.)
const superHeroes = {
      "squadName" : "Super hero squad",
      ...
}- 위 JSON을 다음과 같이 호출하여 사용합니다.
superHeroes.homeTown
superHeroes['active']- 배열일 경우에는 "[index]"의 형식으로 사용 가능합니다.
(index로 사용하는 숫자는 첫 번째가 0부터 시작됩니다)
superHeroes['members'][1]['powers'][2]실습
프로젝트 생성 및 코드 작성
- hero라는 이름의 폴더를 생성합니다.
mkdir hero
cd hero- VSCode에서 폴더를 오픈합니다.
- 아래와 같이 index.html을 만듭니다.
<!DOCTYPE html>
<html>
  <head>
    <meta charset="utf-8">
    <title>Our superheroes</title>
    <link href="https://fonts.googleapis.com/css?family=Faster+One" rel="stylesheet">
    <link rel="stylesheet" href="style.css">
  </head>
  <body>
      <header>
      </header>
      <section>
      </section>
    <script>
    const header = document.querySelector('header');
    const section = document.querySelector('section');
    </script>
  </body>
</html>- 아래와 같이 style.css를 만듭니다.
/* || general styles */
html {
  font-family: 'helvetica neue', helvetica, arial, sans-serif;
}
body {
  width: 800px;
  margin: 0 auto;
}
h1, h2 {
  font-family: 'Faster One', cursive;
}
/* header styles */
h1 {
  font-size: 4rem;
  text-align: center;
}
header p {
  font-size: 1.3rem;
  font-weight: bold;
  text-align: center;
}
/* section styles */
section article {
  width: 33%;
  float: left;
}
section p {
  margin: 5px 0;
}
section ul {
  margin-top: 0;
}
h2 {
  font-size: 2.5rem;
  letter-spacing: -5px;
  margin-bottom: 10px;
}
프로젝트 실행
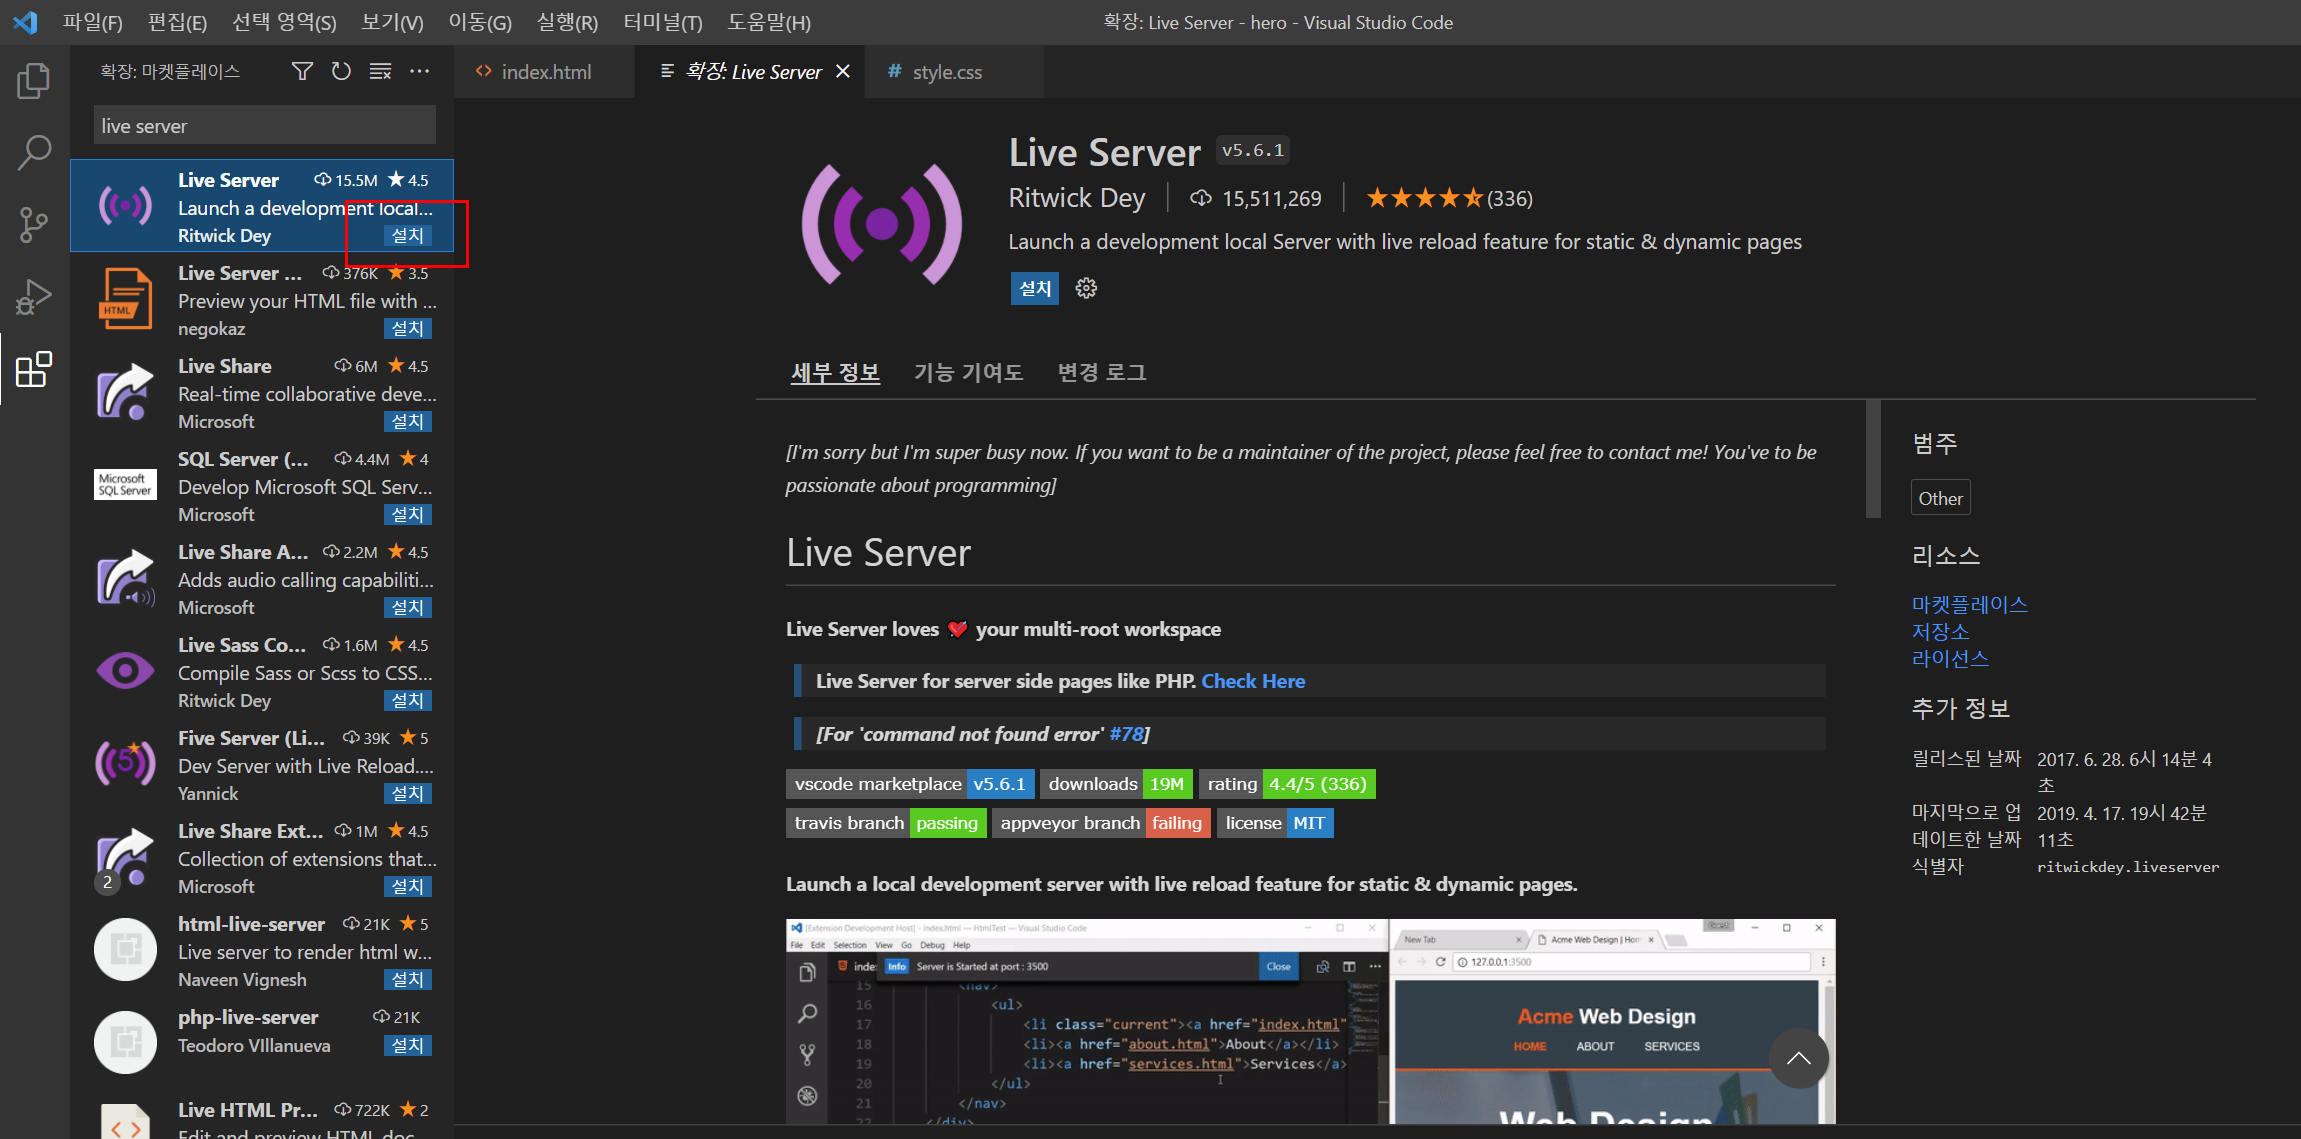
- 우리는 프로그램 실행을 편하게 하기 위해서 VSCode의 확장 프로그램인 Live Server를 사용합니다.
- VSCode의 extention에서 Live Server를 검색하여 설치합니다.
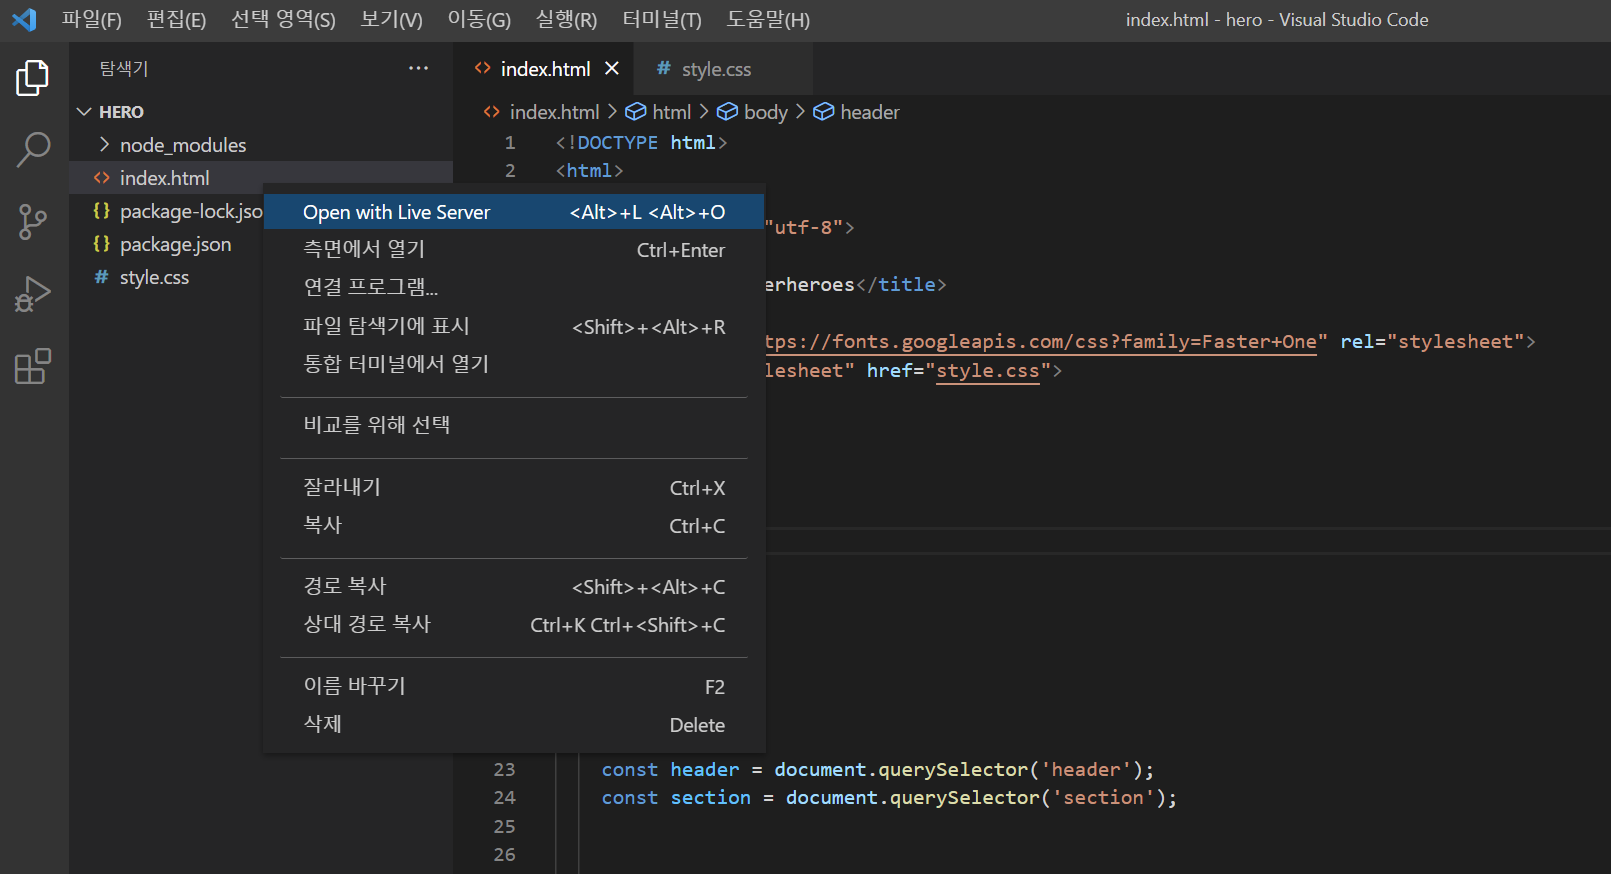
- VSCode의 탐색기에 index.html을 마우스를 우클릭하여 LIve Server를 실행합니다.
- 브라우저가 실행되며 아래와 같이 실행됩니다.

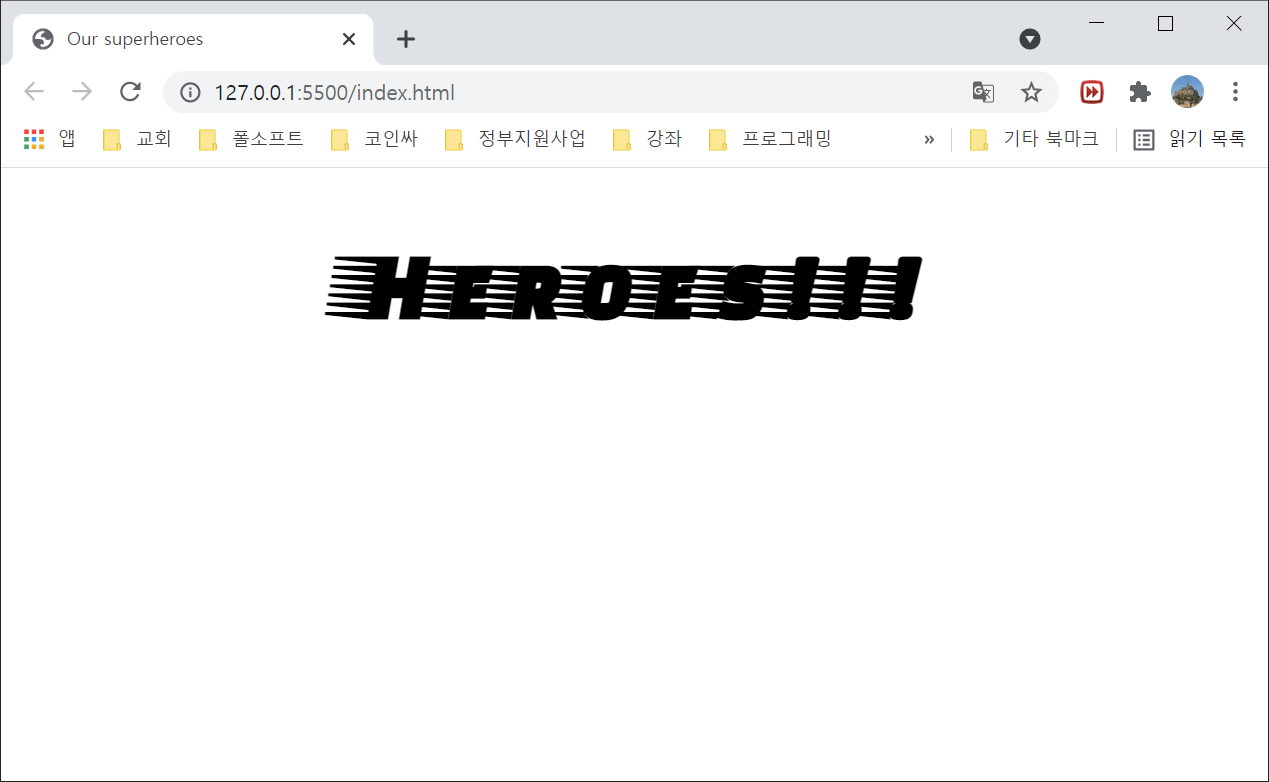
- Live Server가 잘 작동하는지 확인하기 위해 아래와 같이 index.html의 header를 수정합니다.
<header>
    <h1>Heroes!!!</h1>
</header>- 다시 브라우저를 확인합니다.
- 아래와 같이 Title이 나오면 정상입니다.
JSON Data 가져오기
- JSON Data는 아래 URL에서 가져오도록 합니다.
- JSON Data를 요청하는 Code를 index.html에 작성합니다.
- </body> 위에 <script>와 </script>사이에 작성하시면 됩니다.
var requestURL = 'https://mdn.github.io/learning-area/javascript/oojs/json/superheroes.json';
var request = new XMLHttpRequest();
request.open('GET', requestURL);
request.responseType = 'json';
request.send();- Response가 왔을때 처리하는 코드를 아래와 같이 작성합니다.
request.onload = function() {
  var superHeroes = request.response;
  populateHeader(superHeroes);
  showHeroes(superHeroes);
}- 위의 populateHeader function의 Code를 아래와 같이 작성합니다.
function populateHeader(jsonObj) {
  var myH1 = document.createElement('h1');
  myH1.textContent = jsonObj['squadName'];
  header.appendChild(myH1);
  var myPara = document.createElement('p');
  myPara.textContent = 'Hometown: ' + jsonObj['homeTown'] + ' // Formed: ' + jsonObj['formed'];
  header.appendChild(myPara);
}- 위의showHeroes function의 Code를 아래와 같이 작성합니다.
function showHeroes(jsonObj) {
  var heroes = jsonObj['members'];
  for (var i = 0; i < heroes.length; i++) {
    var myArticle = document.createElement('article');
    var myH2 = document.createElement('h2');
    var myPara1 = document.createElement('p');
    var myPara2 = document.createElement('p');
    var myPara3 = document.createElement('p');
    var myList = document.createElement('ul');
    myH2.textContent = heroes[i].name;
    myPara1.textContent = 'Secret identity: ' + heroes[i].secretIdentity;
    myPara2.textContent = 'Age: ' + heroes[i].age;
    myPara3.textContent = 'Superpowers:';
    var superPowers = heroes[i].powers;
    for (var j = 0; j < superPowers.length; j++) {
      var listItem = document.createElement('li');
      listItem.textContent = superPowers[j];
      myList.appendChild(listItem);
    }
    myArticle.appendChild(myH2);
    myArticle.appendChild(myPara1);
    myArticle.appendChild(myPara2);
    myArticle.appendChild(myPara3);
    myArticle.appendChild(myList);
    section.appendChild(myArticle);
  }
}- index.html의 최종 소스는 아래와 같습니다.
<!DOCTYPE html>
<html>
  <head>
    <meta charset="utf-8">
    <title>Our superheroes</title>
    <link href="https://fonts.googleapis.com/css?family=Faster+One" rel="stylesheet">
    <link rel="stylesheet" href="style.css">
  </head>
  <body>
    <header>
    </header>
    <section>
    </section>

    <script>
      const header = document.querySelector('header');
      const section = document.querySelector('section');

      let requestURL = 'https://mdn.github.io/learning-area/javascript/oojs/json/superheroes.json';
      let request = new XMLHttpRequest();
      request.open('GET', requestURL);
      request.responseType = 'json';
      request.send();

      request.onload = function() {
        const superHeroes = request.response;
        populateHeader(superHeroes);
        showHeroes(superHeroes);
      }

      function populateHeader(obj) {
        const myH1 = document.createElement('h1');
        myH1.textContent = obj['squadName'];
        header.appendChild(myH1);

        const myPara = document.createElement('p');
        myPara.textContent = 'Hometown: ' + obj['homeTown'] + ' // Formed: ' + obj['formed'];
        header.appendChild(myPara);
      }

      function showHeroes(obj) {
        const heroes = obj['members'];

        for(let i = 0; i < heroes.length; i++) {
          const myArticle = document.createElement('article');
          const myH2 = document.createElement('h2');
          const myPara1 = document.createElement('p');
          const myPara2 = document.createElement('p');
          const myPara3 = document.createElement('p');
          const myList = document.createElement('ul');

          myH2.textContent = heroes[i].name;
          myPara1.textContent = 'Secret identity: ' + heroes[i].secretIdentity;
          myPara2.textContent = 'Age: ' + heroes[i].age;
          myPara3.textContent = 'Superpowers:';

          const superPowers = heroes[i].powers;
          for(let j = 0; j < superPowers.length; j++) {
            const listItem = document.createElement('li');
            listItem.textContent = superPowers[j];
            myList.appendChild(listItem);
          }

          myArticle.appendChild(myH2);
          myArticle.appendChild(myPara1);
          myArticle.appendChild(myPara2);
          myArticle.appendChild(myPara3);
          myArticle.appendChild(myList);

          section.appendChild(myArticle);
        }
      }
    </script>
  </body>
</html>
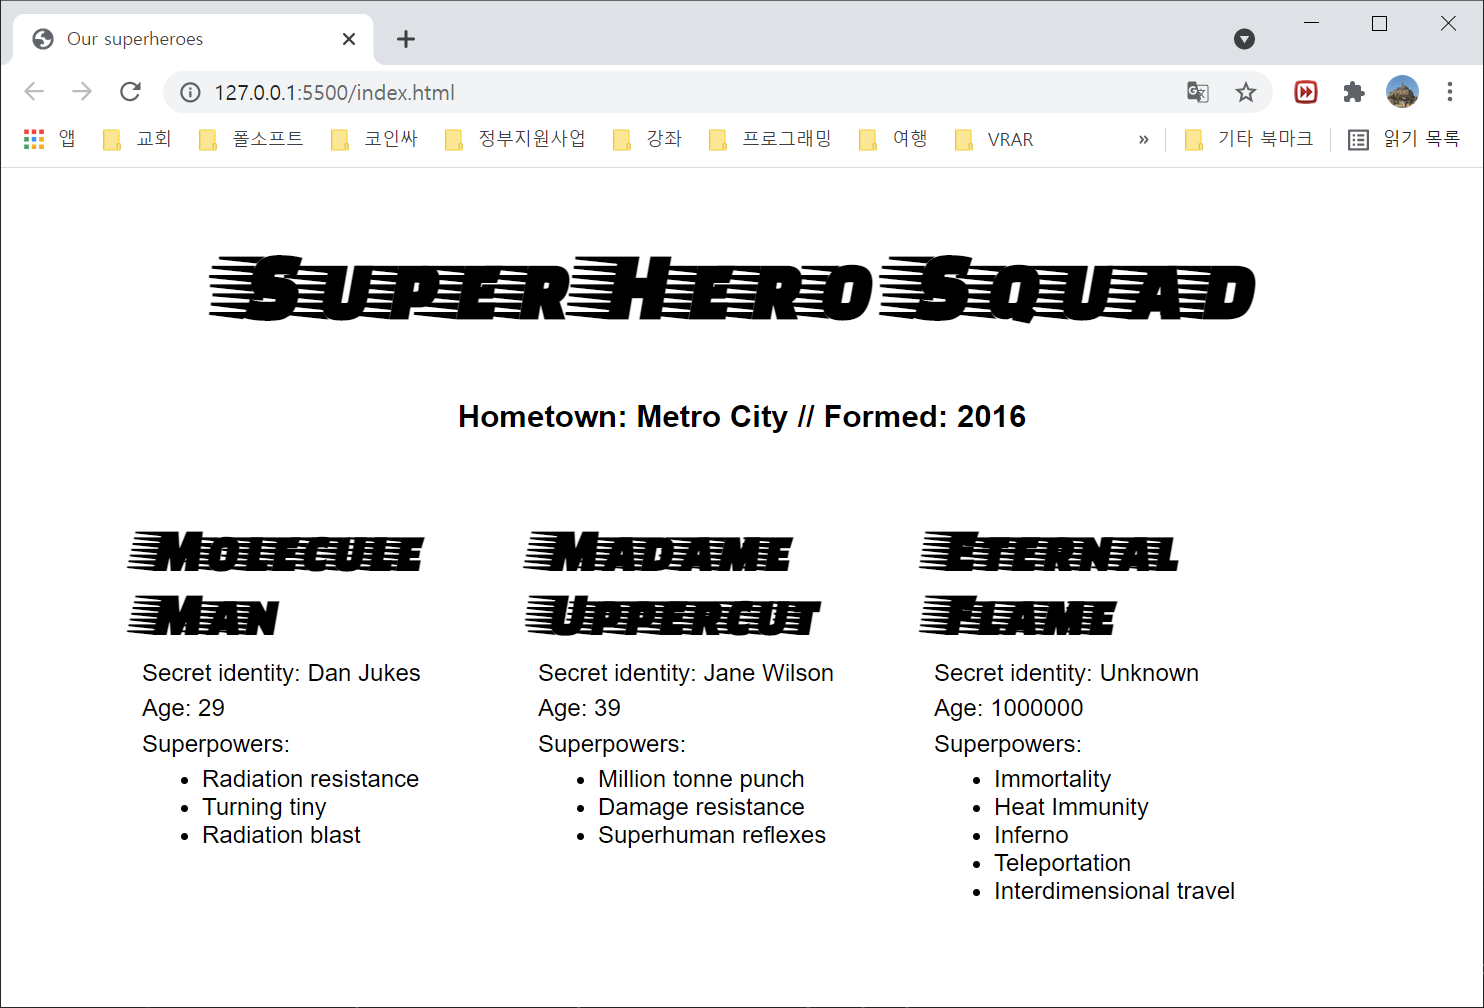
최종 실행 화면
- 문제 없이 실행 되었을 경우 아래와 같은 화면을 보실 수 있습니다.
이상으로 JSON에 대해서 알아보고 간단한 실습을 수행하여 보았습니다.
JSON은 어려운 문법이 아니고 많이 사용하고 있습니다.
사용법을 잘 익혀 두시면 프로그램 개발시 많은 도움이 될것입니다.
반응형
'자바스크립트' 카테고리의 다른 글
| Javascript 기초 문법 (0) | 2021.12.12 |
|---|