반응형

다음은 이 글의 동영상 강좌입니다.

https://youtu.be/A8FcYGEe2i4

이번 시간은 아마존에서 제공하는 Storage Service인 S3에 파일을 업로드 하는 것을 알아봅니다.

S3는 Simple Storage Service의 각 단어 첫번째 글자가 S가 3개라는 의미입니다.

S3를 이용하면 이미지 파일을 저장할 수 있고, 저장된 이미지를 웹에서 볼 수 있습니다.


순서는 다음과 같습니다.

  • AWS S3에 버킷 생성
  • Cognito Identity Pool(자격 증명 풀) 생성
  • IAM에서 자격 증명 풀에 S3 권한 추가

AWS에서 S3 버킷 생성 

우선 AWS에 로그인 한 후 "S3"를 검색하여 서비스로 이동합니다.

AWS S3


S3를 사용하기 위해서는 아래와 같이 Bucket을 생성해 주어야 합니다.

  • 왼쪽 메뉴의 "버킷"을 클릭
  • "버킷만들기" 버튼을 클릭버킷의 이름은 S3 서비스를 통틀어 유일해야만 함.

  • 리전을 선택한 후
  • 버킷 선택을 클릭

  • 퍼블릭 액세스 차단 설정에서 "모든 퍼블릭 엑세스 차단"의 체크 박스를 해제.
    • 현재는 샘플 프로젝트이므로 보안 작업 없이 진행합니다.
    • 운영 환경에서는 권한을 반드시 설정하여 사용하시기 바랍니다.

  • "모든 퍼블릭 액세스 차단을 비활성화하면..." 아래의 체크박스를 체크.

  • "버킷 만들기" 클릭

  • 버킷 생성이 완료되면 생성된 버킷명을 클릭하고, "권한" 탭을 클릭


  • CORS 항목에서 "편집"을 클릭한 후 다음 내용을 입력합니다.
[
    {
        "AllowedHeaders": [
            "*"
        ],
        "AllowedMethods": [
            "GET",
            "PUT",
            "POST",
            "HEAD"
        ],
        "AllowedOrigins": [
            "*"
        ],
        "ExposeHeaders": [
            "x-amz-server-side-encryption",
            "x-amz-request-id",
            "x-amz-id-2"
        ],
        "MaxAgeSeconds": 3000
    }
]

Cognito Identity Pool(자격 증명 풀) 생성

  • aws에서 cognito 서비스를 검색하여 이동합니다.

  • "자격 증명 풀 관리"를 클릭.

  • "새 자격 증명 풀 만들기"를 클릭.

  • 자격 증명 풀 이름 입력(예: SliderS3Access)
  • "인증되지 않은 자격 증명에 대한 액세스 활성화" 클릭

  • "풀 생성" 버튼 클릭

  • "허용" 버튼 클릭

  • 샘플 코드의 플랫폼에서 "JavaScript"를 선택하면 아래와 같은 코드가 나타납니다.

  • 이 코드를 소스에 추가하면 업로드가 가능해집니다.

IAM에서 권한 추가

  • AWS의 IAM 서비스로 이동합니다.

  • "역할" 메뉴에서 "slider"로 검색.
  • 생성된 Role을 클릭.(예 : Cognito_SliderS3AccessAuth_Role)

  • "권한 추가" 클릭 후 "정책 연결"을 선택.

  • 기타 권한 정책에서 "s3"로 검색 후 "AmazonS3FullAccess"를 선택.
  • "정책 연결" 버튼을 클릭.

이렇게 하면 S3에 업로드 할 수 있는 권한 생성 및 설정이 완료되었습니다.

반응형
반응형

이번 시간은 front에서 jwt 토큰을 추가하여 사용자 조회를 하고, 권한 관리를 하는 기능을 구현 해 봅니다.

백엔드(slider-api)

토큰 Validation

권한 관리를 위해 JWT Token validation을 추가 합니다.

이것은 사용자가 header에 token을 보냈을때 사용자 정보를 조회하는 기능입니다.

/src/auth/security/passport.jwt.strategy.ts

async validate(payload: Payload, done: VerifiedCallback): Promise<any> {
    const user = await this.authService.tokenValidateUser(payload);
    if(!user) {
        return done(new UnauthorizedException({message: 'user does not exist'}), false);
    }
    return done(null, user);
}

authService에 tokenValidateUser를 추가합니다.

/src/auth/auth.service.ts

async tokenValidateUser(payload: Payload): Promise<User| undefined> {
    const userFind = await this.userService.findByFields({
        where: { id: payload.id }
    });
    this.flatAuthorities(userFind);
    return userFind;
}

private flatAuthorities(user: any): User {
    if (user && user.authorities) {
        const authorities: string[] = [];
        user.authorities.forEach(authority => authorities.push(authority.authorityName));
        user.authorities = authorities;
        for(const auth of authorities){
            if(auth === RoleType.ADMIN){
                user.isAdmin = true;
	        }
        }
    }
    return user;
}

로그인한 사용자만 접근할 수 있도록 Auth Guard를 만듭니다.

/src/auth/security/auth.guard.ts

import { ExecutionContext, Injectable, UnauthorizedException } from "@nestjs/common";
import { AuthGuard as NestAuthGuard } from "@nestjs/passport";
import { Observable } from "rxjs";

@Injectable()
export class AuthGuard extends NestAuthGuard('jwt'){
    canActivate(context: ExecutionContext): boolean | Promise<boolean> | Observable<boolean> {
        return super.canActivate(context)
    }

    handleRequest(err, user, info) {
        if (err || !user) {
            throw err || new UnauthorizedException();
        }
        return user;
    }
}

권한별로 접근할 수 있도록 Role Guard를 만듭니다.

여기서는 일반 사용자와 관리자 권한을 체크하려고 합니다.

/src/auth/security/role.guard.ts

import { CanActivate, ExecutionContext, Injectable } from '@nestjs/common';
import { Reflector } from '@nestjs/core';
import { User } from '../../domain/user.entity';


@Injectable()
export class RolesGuard implements CanActivate {
    constructor(private readonly reflector: Reflector) {}

    canActivate(context: ExecutionContext): boolean {
        const roles = this.reflector.get<string[]>('roles', context.getHandler());

        if (!roles) {
            return true;
        }

        const request = context.switchToHttp().getRequest();
        const user = request.user as User;
        console.log(`auth include : ${user.authorities.some(role => roles.includes(role))}`)

        return user && user.authorities && user.authorities.some(role => roles.includes(role));
    }
}

AuthController에서 사용자 정보를 조회하는 API를 추가합니다.

이 api는 "/auth/user"를 통해 호출할 수 있으며,

@UseGuards(AuthGuard)를 사용하였으므로 로그인한 사용자만 사용이 가능합니다.

/src/auth/auth.controller.ts

// 사용자 정보 조회
@UseGuards(AuthGuard)
@Get('/user')
getUser(@Request() req): any {
    console.log(req);
    return req.user;
}


프론트엔드(slider-front)

사용자 정보 조회

이제 front에서 로그인 후 사용자 정보를 조회하는 로직을 추가합니다.


우선 store에 user와 isAdmin을 추가합니다.

/store/index.js

export const state = () => ({
    accessToken: '',
    user: '',
});

export const mutations = {
    accessToken (state, data) {
        state.accessToken = data;
    },
    user (state, data) {
        state.user = data;
    },
}

로그인 후 api를 호출해 사용자 정보를 조회하고 store에 저장합니다.

/pages/kakao-callback.vue

const response = await this.$axios.$post(
    '/auth/login', body, {}
)
if(response){
  const accessToken = response.accessToken;
  console.log(accessToken);
  // 토큰을 스토어에 저장하기
  this.$store.commit('accessToken', accessToken);
  const options = {
    headers: {
      Authorization: `Bearer ${accessToken}`
    },
  };
  //토큰을 이용하여 사용자 정보 조회하기
  const user = await this.$axios.get("/auth/user", options);
  const loginUser = user.data;
  console.log(loginUser);
  this.$store.commit('user', loginUser);
}
return this.$router.push('/')

Navigation에서 관리자일 경우만 관리자 링크를 보여주도록 추가합니다.

/layouts/default.vue

<template>
  <div>
    <b-navbar toggleable="lg" type="dark" variant="info">
      <b-navbar-brand href="#">Slider</b-navbar-brand>

      <b-navbar-toggle target="nav-collapse"></b-navbar-toggle>

      <b-collapse id="nav-collapse" is-nav>
        <b-navbar-nav class="ml-auto" v-if="!accessToken">
          <b-nav-item href="/login" right>로그인</b-nav-item>
        </b-navbar-nav>
        <b-navbar-nav class="ml-auto" v-if="accessToken && accessToken!==''">
          <b-nav-item @click="admin" right v-if="user.isAdmin">관리자</b-nav-item>
          <b-nav-item @click="logout" right>로그아웃</b-nav-item>
        </b-navbar-nav>
      </b-collapse>
    </b-navbar>
    <nuxt/>
  </div>
</template>
<script>
export default {
  name: 'Layout',
  data() {
    return {
      auth: false
    }
  },
  mounted() {
    this.$nuxt.$on('auth', auth=>{
      this.auth = auth
      console.log(auth)
    })
  },
  methods: {
    async logout() {
      await this.$store.commit('accessToken', '');
      await this.$router.push('/');
    },
    async admin() {
      alert('관리자 메뉴!!!')
    }
  },
  computed: {
    accessToken() {
      return this.$store.state.accessToken
    },
    user() {
      return this.$store.state.user;
    },
  }
}
</script>


테스트

로그인 테스트를 하면 다음과 같은 결과를 확인할 수 있습니다.


MySQL의 user_authority 테이블에 관리자 권한을 추가합니다.


다시 로그인 테스트를 하면 관리자 메뉴가 추가된걸 보실 수 있습니다.


* 참고로 백엔드에서 admin 권한 체크를 하실때는 controller에 다음과 같이 데코레이터를 추가하시면 됩니다.

@UseGuards(AuthGuard,RolesGuard)
@Roles(RoleType.ADMIN)


반응형
반응형

아래는 이 글의 동영상 강좌입니다.

https://youtu.be/QO1NunXmDuU


Jwt Token을 이용하여 frontend에서 로그인을 하는 방법을 알아보겠습니다.


Store 기능 사용하기

로그인 정보 저장을 위해 store를 사용하도록 합니다.

store 폴더 아래에 index.js 를 추가하고 다음 코드를 입력합니다.

/store/index.js

export const state = () => ({
    accessToken: {}
});

export const mutations = {
    accessToken (state, data) {
        state.accessToken = data;
    }
}


Navbar 만들기

Navbar를 만드는 다양한 방법이 있습니다. 이번엔 bootstrap vue를 이용하도록 합니다.

Nuxt 프로젝트에 bootstrap vue를 사용하는 방법은 다음 사이트를 참조하세요. https://bootstrap-vue.org/docs 

아래 명령으로 slider-front 프로젝트에 설치를 합니다.

yarn add bootstrap-vue

nuxt-config.js에 다음 설정을 추가합니다.

modules = {
  'bootstrap-vue/nuxt'
}

프로젝트에 layouts 폴더를 만들고 default.vue를 만듭니다.

bootstrap vue 사이트의 navbar 샘플을 복사하여 default.vue의 template에 붙여놓고 아래와 같이 변경합니다.

<template>
  <div>
  <b-navbar toggleable="lg" type="dark" variant="info">
    <b-navbar-brand href="#">Slider</b-navbar-brand>

    <b-navbar-toggle target="nav-collapse"></b-navbar-toggle>

    <b-collapse id="nav-collapse" is-nav>
      <b-navbar-nav class="ml-auto" v-if="!accessToken">
        <b-nav-item href="/login" right>로그인</b-nav-item>
      </b-navbar-nav>
      <b-navbar-nav class="ml-auto" v-if="accessToken && accessToken!==''">
        <b-nav-item @click="logout" right>로그아웃</b-nav-item>
      </b-navbar-nav>
    </b-collapse>
  </b-navbar>
  <nuxt/>
  </div>
</template>
<script>
export default {
  name: 'Layout',
  methods: {
    async logout() {
      await this.$store.commit('accessToken', '');
      await this.$router.push('/');
    }
  },
  computed: {
    accessToken() {
      return this.$store.state.accessToken
    }
  }
}
</script>


Login

기존 index.vue를 login.vue로 변경합니다.

index.vue를 만들고 다음과 같이 입력합니다.

index 페이지에서 로그인이 잘 되었는지를 확인하기 위해 accessToken을 보여주는 예제입니다.

/pages/index.vue

<template>
  <div>
    <div>Welcome!</div>
    <div v-if="accessToken">{{accessToken}}</div>
  </div>
</template>
<script>
export default {
  name: 'IndexPage',
  computed: {
    accessToken() {
      return this.$store.state.accessToken
    }
  }
}
</script>

로그인 API 호출 로직 수정

pages/kakao-callback.vue를 다음과 같이 수정합니다.

<template>
  <div>로그인중....</div>
</template>

<script>
  export default {
    async mounted() {
      try{
        if(!this.$route.query.code){
          return this.$router.push('/')
        }
        console.log(`code : ${this.$route.query.code}`)
        const body = {
          code: this.$route.query.code,
          domain: window.location.origin
        }
        const response = await this.$axios.$post(
            '/auth/login', body, {}
        )
        if(response){
          console.log(response.accessToken);
          this.$store.commit('accessToken', response.accessToken);
        }
        return this.$router.push('/')
      }catch(error){
        console.log(error)
      }
    }
  }
</script>

프로젝트 실행화면

프로젝트를 실행하면 다음과 같은 화면을 보실 수 있습니다.


첫화면


로그인 화면


로그인 성공 후 화면


반응형
반응형

이번 시간은 JWT 인증 기능을 추가해 보겠습니다.


다음은 이 강의의 동영상입니다.

https://youtu.be/SClJMs2BlWk


JWT에 관한 자세한 사항은 제가 이전에 작성한 글을 참조해 주세요.

https://codegear.tistory.com/72


[Nodejs 프레임워크]NestJS - 12. JWT 토큰 생성

다음은 이글의 동영상 강의 입니다. https://youtu.be/H4VS-Osylvo 토큰을 이용한 API 호출 방법 REST API 호출시 토큰을 이용하면 사용자 인증과 권한을 체크할 수 있습니다. 다음 그림은 토큰의 생성과 호

codegear.tistory.com


JWT 관련 패키지 추가

jwt 인증을 위해서는 다음과 같은 패키지가 필요합니다.

- @nestjs/jwt

- @nestjs/passport

- passport

- passport-jwt

아래와 같이 패키지를 추가합니다.

yarn add @nestjs/jwt @nestjs/passport passport passport-jwt


Payload 인터페이스 생성

jwt인증시엔 payload interface가 필요합니다.

아래와 같이 같이 Payload interface를 만듭니다.(참조 : https://jwt.io/)

/src/auth/security/payload.interface.ts

export interface Payload {
    id: number;
    name: string;
    authorities?: any[];
}

JwtStrategy 를 아래와 같이 작성합니다.

/src/auth/security/passport.jwt.stategy.ts

import { Injectable, UnauthorizedException } from "@nestjs/common";
import { PassportStrategy } from "@nestjs/passport";
import { ExtractJwt, Strategy } from "passport-jwt";
import { AuthService } from "../auth.service";

@Injectable()
export class JwtStrategy extends PassportStrategy(Strategy){
    constructor(private authService: AuthService){
        super({
            jwtFromRequest: ExtractJwt.fromAuthHeaderAsBearerToken(),
            ignoreExpiration: true,
            secretOrKey: process.env.JWT_SECRET
        })
    }
}


로그인 및 회원 가입

카카오 로그인 후에 회원 로그인 및 회원 가입을 처리합니다.

- 회원 데이터가 없을 경우는 회원 가입을 처리합니다.

- 회원 데이터가 있을 경우는 로그인 처리를 합니다.


우선 auth.controller에서 카카오 로그인을 한 후 다음 코드를 추가합니다.

/src/auth/auth.controller.ts

			console.log(`kakaoUserInfo : ${JSON.stringify(kakao)}`);
            if (!kakao.id) {
                throw new BadRequestException('카카오 로그인 실패!');
            }

            // 로그인 처리 - 회원 가입이 안되어 있을 경우 가입 처리
            const jwt =  await this.authService.login(kakao);
            console.log(`jwt.accessToken : ${jwt.accessToken}`);
            res.send({
                accessToken: jwt.accessToken,
                message: 'success'
            });

authService에서 고객을 조회하고, 로그인을 처리합니다.

/src/auth/auth.service.ts

async login(kakao): Promise<{accessToken: string} | undefined> {
	let userFind: User = await this.userService.findByFields({
            where: { kakaoId: kakao.id }
        });
        if(!userFind) {
            isFirstLogin = true;
            // 회원 가입
            const user = new User();
            user.kakaoId = kakao.id;
            user.email = kakao.kakao_account.email;
            user.name = kakao.kakao_account.name;
            
            userFind = await this.registerUser(user);
        }

        const payload: Payload = {
            id: userFind.id,
            name: userFind.name,
            authorities: userFind.authorities
        };
        return {
            accessToken: this.jwtService.sign(payload)
        };
}

userService에  findByFields, registerUser를 추가합니다.

/src/auth/user.service.ts

   constructor(
        @InjectRepository(User)
        private userRepository: Repository<User>,
        @InjectRepository(UserAuthority)
        private userAuthorityRepository: Repository<UserAuthority>,
    ){}
    
    async findByFields(options: FindOneOptions<User>): Promise<User | undefined> {
        return await this.userRepository.findOne(options);
    }
    
    async registerUser(newUser: User): Promise<User> {
        let userFind: User = await this.findByFields({
            where: { kakaoId: newUser.kakaoId }
        });
        if(userFind) {
            throw new HttpException('Username aleady used!', HttpStatus.BAD_REQUEST);
        }
        const registeredUser = await this.userService.save(newUser);
        if(registeredUser){
            await this.saveAuthority(registeredUser.id);
        }else {
            throw new HttpException('Username register error!', HttpStatus.INTERNAL_SERVER_ERROR);
        }

        return registeredUser;
    }
    
    async save(user: User): Promise<User | undefined> {
        return await this.userRepository.save(user);
    }
    
    async saveAuthority(userId: number): Promise<UserAuthority | undefined> {
        let userAuth = new UserAuthority();
        userAuth.userId = userId;
        userAuth.authorityName = RoleType.USER;
        return await this.userAuthorityRepository.save(userAuth);
    }

권한 Type을 선언한 RoleType을 만들어줍니다.

/src/auth/role-type.ts

export enum RoleType {
    USER = 'ROLE_USER',
    ADMIN = 'ROLE_ADMIN',
}


auth.module에 jwtModule을 추가하고 import 합니다.

/src/auth/auth.module.ts

import { JwtModule } from '@nestjs/jwt';
import { JwtStrategy } from './security/passport.jwt.strategy';
...
@Module({
  imports: [
    TypeOrmModule.forFeature([User]),
    JwtModule.register({
      secret: process.env.JWT_SECRET,
      signOptions: {expiresIn: '300s'},
    }),
    PassportModule
  ],
  exports: [TypeOrmModule, UserService],
  controllers: [AuthController],
  providers: [AuthService, UserService, JwtStrategy]
})
export class AuthModule {}


프론트에서 로그인을 하면 브라우저의 콘솔에서 아래와 같이 jwt token을 확인할 수 있습니다.

반응형
반응형

다음은 이 글의 동영상 강좌입니다.

https://youtu.be/7sT3G9ZwyzM


카카오 로그인 기능을 만들어봅니다.


진행 순서는 다음과 같습니다.

  1. 카카오 developer 사이트에서 application 생성
  2. 프론트 개발
  3. 백엔드 개발

보다 자세한 설명은 이전 영상을 보시면 됩니다.

https://www.youtube.com/watch?v=E-a-wQqybbE 


카카오 developer 사이트에서 application 생성

  • 우선 카카오 로그인을 사용하기 위해 https://developers.kakao.com/ 에서 로그인을 합니다.
  • 상단의 내 애플리케이션 메뉴를 클릭 합니다.

  • 애플리케이션 추가하기를 클릭합니다.

  • 애플리케이션 정보를 입력합니다.

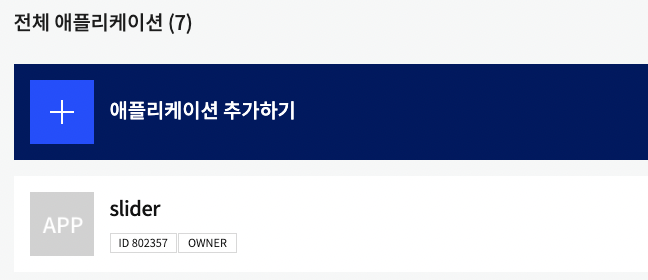
  • 애플리케이션 목록에서 새로 만든 slider를 확인할 수 있습니다.

  • slider 앱을 클릭하면 앱에 대한 정보를 확인할 수 있습니다.

  • 플랫폼 -> 플랫폼 설정하기를 클릭합니다.

  • 우리는 Web으로 개발을 할 것이므로 web을 클릭합니다. 사이트 도메인에 http://localhost:3000 를 입력한 후 저장합니다.
    *http://localhost:3000 는 로컬에서 프론트를 개발하여 테스트 하기 위한 정보입니다.

  • 저장이 완료되면 다음과 같이 변경된것을 확인할 수 있습니다. 여기서 Redirect URI 등록하러 가기를 클릭합니다.

  • 활성화 설정은 ON 으로 변경하고, Redirect URI 등록을 클릭합니다. 

  • Redirect URI에 http://localhost:3000/kakao-callback 을 입력합니다.

  • Left 메뉴에서 카카오로그인 -> 동의 항목을 클릭합니다.

  •  동의 항목은 카카오 로그인시 가져올 수 있는 고객의 정보를 선택하는 화면입니다.

  • 설정 항목을 클릭한 후 필수 또는 선택 동의로 변경하고, 저장합니다.
    * 필수 동의(검수 필요)가 disable되어 있는 경우는 비즈니스 채널을 신청해야만 선택할 수 있습니다.

  • 카카오 애플리케이션 설정이 완료되었습니다.

프론트 개발

  • 다운로드 받은 이미지를 프로젝트의 /static/images/kakao_login.png로 복사합니다.
  • 카카오 로그인 모듈을 사용하기 위해 
    /nuxt.config.js 의 head 부분에 다음을 추가합니다.
script: [
  {
    src: 'https://developers.kakao.com/sdk/js/kakao.js'
  }
]
  • index page를 수정합니다.
    /pages/index.vue
<template>
  <a @click="loginWithKakao">
    <img src="/images/kakao_login.png"/>
  </a>
</template>

<script>
export default {
  name: 'IndexPage',
  methods: {
    kakaoInit () {
      Kakao.init('329a6a74...')// KaKao client key
      Kakao.isInitialized()
    },
    async loginWithKakao () {
      await Kakao.Auth.authorize({
        redirectUri: `${window.location.origin}/kakao-callback`
      })
    }
  },
  mounted () {
    this.kakaoInit()
  }
}
</script>
  • callback 페이지를 추가합니다.
    /pages/kakao-callback.vue
<template>
  <div>
    로그인 중 입니다...
  </div>
</template>

<script>
export default {
  async mounted () {
    try {
      // code 유무 체크
      if (!this.$route.query.code) {
        return this.$router.push('/')
      }
      console.log(`code : ${this.$route.query.code}`)
      // 서버 로그인 요청(kakao 인증 코드 전달)
      const body = {
        code: this.$route.query.code,
        domain: window.location.origin
      }
      const response = await this.$axios.$post(
        '/auth/login', body, {}
      )
      console.log(response)
    } catch (error) {
      console.log(error)
    }
  }
}
</script>
  • 이제 프론트를 실행하고 테스트 해봅니다.
yarn dev
  • 카카오 로그인 버튼을 클릭합니다.

  • 동의 화면이 나오고 동의 체크 후

  • 크롬의 콘솔을 실행해보면 code 값이 찍힌 것을 확인할 수 있습니다.

백엔드 개발

  • slider-api 프로젝트를 open 합니다.
  • 포트 변경 - frontend에서 3000번 포트를 사용하고 있으므로, backend 포트를 3003으로 바꿔주겠습니다.
    /src/main.ts
  await app.listen(3003);
  • front의 호출 url도 http://localhost:3003으로 변경합니다.
    /nuxt.config.js
axios: {
	baseURL: 'http://localhost:3003'
},
  • 카카오 api 호출을 위해 axios 패키지를 추가합니다.
yarn add axios
  • generator로 auth module/controller/service를 생성합니다.
nest g module auth
nest g controller auth
nest g service auth
  • authController에 다음을 추가합니다.
    src/auth/auth.controller.ts
import { Controller, Post, Body, Response, BadRequestException, UnauthorizedException } from '@nestjs/common';
import { AuthService } from './auth.service';

@Controller('auth')
export class AuthController {
    constructor(
        private authService: AuthService
    ){}
    @Post('/login')
    async login(@Body() body: any, @Response() res): Promise<any> {
        try {
        // 카카오 토큰 조회 후 계정 정보 가져오기
        const { code, domain } = body;
        if (!code || !domain) {
            throw new BadRequestException('카카오 정보가 없습니다.');
        }
        const kakao = await this.authService.kakaoLogin({ code, domain });

        console.log(`kakaoUserInfo : ${JSON.stringify(kakao)}`);
        if (!kakao.id) {
            throw new BadRequestException('카카오 정보가 없습니다.');
        }

        res.send({
            user: kakao,
            message: 'success',
        });
        } catch (e) {
            console.log(e);
            throw new UnauthorizedException();
        }
    }
}
  • authService에 다음을 추가합니다.
    /src/auth/auth.service.ts
import { Injectable, UnauthorizedException } from '@nestjs/common';
import axios from 'axios';
import * as qs from 'qs';

@Injectable()
export class AuthService {
    async kakaoLogin(options: { code: string; domain: string }): Promise<any> {
        const { code, domain } = options;
        const kakaoKey = '87073966cb41...';
        const kakaoTokenUrl = 'https://kauth.kakao.com/oauth/token';
        const kakaoUserInfoUrl = 'https://kapi.kakao.com/v2/user/me';
        const body = {
          grant_type: 'authorization_code',
          client_id: kakaoKey,
          redirect_uri: `${domain}/kakao-callback`,
          code,
        };
        const headers = {
          'Content-Type': 'application/x-www-form-urlencoded;charset=utf-8',
        };
        try {
          const response = await axios({
            method: 'POST',
            url: kakaoTokenUrl,
            timeout: 30000,
            headers,
            data: qs.stringify(body),
          });
          if (response.status === 200) {
            console.log(`kakaoToken : ${JSON.stringify(response.data)}`);
            // Token 을 가져왔을 경우 사용자 정보 조회
            const headerUserInfo = {
              'Content-Type': 'application/x-www-form-urlencoded;charset=utf-8',
              Authorization: 'Bearer ' + response.data.access_token,
            };
            console.log(`url : ${kakaoTokenUrl}`);
            console.log(`headers : ${JSON.stringify(headerUserInfo)}`);
            const responseUserInfo = await axios({
              method: 'GET',
              url: kakaoUserInfoUrl,
              timeout: 30000,
              headers: headerUserInfo,
            });
            console.log(`responseUserInfo.status : ${responseUserInfo.status}`);
            if (responseUserInfo.status === 200) {
              console.log(
                `kakaoUserInfo : ${JSON.stringify(responseUserInfo.data)}`,
              );
              return responseUserInfo.data;
            } else {
              throw new UnauthorizedException();
            }
          } else {
            throw new UnauthorizedException();
          }
        } catch (error) {
          console.log(error);
          throw new UnauthorizedException();
        }
      }
}

* kakaoKey는 kakao developers 사이트에서 생성한 RestAPI 키를 입력합니다.

  • 브라우저에서 http://localhost:3000을 입력하고 로그인을 해보면 다음과 같이 CORS 오류를 만나게 됩니다.

  • CORS를 해결하기 위해 main.ts에 설정을 추가합니다.
    /src/main.ts
import { NestFactory } from '@nestjs/core';
import { AppModule } from './app.module';

async function bootstrap() {
  const app = await NestFactory.create(AppModule);
  const whitelist = [
    'http://localhost:3000'
  ];
  app.enableCors({
    origin: function (origin, callback) {
      if (!origin || whitelist.indexOf(origin) !== -1) {
        callback(null, true)
      } else {
        callback(new Error('Not allowed by CORS'))
      }
    },
    allowedHeaders: '*',
    methods: "GET,PUT,PATCH,POST,DELETE,UPDATE,OPTIONS",
    credentials: true,
  });
  await app.listen(3003);
}
bootstrap();
  • 다시 브라우저에서 로그인을 시도합니다.
    로그인이 완료되면 크롬 콘솔에서 다음과 같은 로그를 확인할 수 있습니다.

카카오 로그인이 완료되었습니다.


다음 시간에는 로그인에 JWT 인증을 추가하는 것을 진행합니다.

반응형
반응형

이 글의 동영상 강좌

https://youtu.be/P9fvgGHd_Jg

Backend의 Nestjs에서 Database(MySQL)를 연결하기 위해 TypeORM을 설정해봅니다.


진행 순서는 다음과 같습니다.

MySQL Schema와 User 생성

MySQL Workbench를 이용해서 Schema와 User를 생성합니다.

- Schema : slider

- User : slider

- Password : 1234

자세한 내용은 이전에 작성한 내용을 참조하시기 바랍니다.

https://codegear.tistory.com/32


데이터베이스기초-02.MySQL-Schema, User, Table 생성하기

이 글의 동영상 강의입니다. https://youtu.be/hOOiqk8Z1gQ MySQL Workbench를 이용하여 가장 기본적인 Schema와 User를 생성하고, User에게 Schema의 권한을 주는법과, Schema에 Table을 생성하는 법을 알아보겠..

codegear.tistory.com


패키지 설치

TypeORM과 MySQL 패키지를 설치합니다.

yarn add @nestjs/typeorm typeorm mysql2


TypeORM 설정

/src/orm.config.ts 파일을 아래와 같이 생성합니다.

import { TypeOrmModuleOptions } from '@nestjs/typeorm';

function ormConfig(): TypeOrmModuleOptions {
  const commonConf = {
    SYNCRONIZE: false,
    ENTITIES: [__dirname + '/domain/*.entity{.ts,.js}'],
    MIGRATIONS: [__dirname + '/migrations/**/*{.ts,.js}'],
    MIGRATIONS_RUN: false,
  };

  return {
    name: 'default',
    type: 'mysql',
    database: process.env.DB_NAME,
    host: process.env.DB_HOST,
    port: Number(process.env.DB_PORT),
    username: process.env.DB_USER,
    password: process.env.DB_PASS,
    logging: true,
    synchronize: commonConf.SYNCRONIZE,
    entities: commonConf.ENTITIES,
    migrations: commonConf.MIGRATIONS,
    migrationsRun: commonConf.MIGRATIONS_RUN,
  };
}

export { ormConfig };


Main Module에 typeorm config 설정 추가

/src/app.module.ts에서 @Module -> imports 아래에 다음 내용을 추가합니다.

....
import { TypeOrmModule } from '@nestjs/typeorm';
import { ormConfig } from './orm.config';

@Module({
    imports: [
    	TypeOrmModule.forRootAsync({ useFactory: ormConfig }),
    ]
....


환경 설정 파일(.env) 생성

orm.config.ts에서 process.env.DB_NAME과 같은 형태로 환경변수를 참조하도록 했습니다.

/.env 파일을 아래와 같이 생성합니다.(.env는 dotenv라고 읽습니다.)

NODE_ENV=local
DB_HOST=localhost
DB_PORT=3306
DB_USER=slider
DB_PASS=1234
DB_NAME=slider

- local db에 설정한데로 값을 입력하면 됩니다.


@nestjs/config 모듈 추가

.env 파일을 사용하기 위해서는 dotenv모듈이 필요합니다.
nestjs에서는 @nestjs/config 모듈을 설치하면 dotenv모듈을 사용할 수 있습니다.

아래와 같이 설치를 합니다.

yarn add @nestjs/config

아래와 같이 main module에 ConfigModule 관련 설정을 추가합니다.

/src/app.module.ts

import { ConfigModule } from '@nestjs/config';
...

@Module({
  imports: [
    ConfigModule.forRoot({
      isGlobal: true
    }),
    ....]
...


로그 확인

이제 application을 실행해봅니다.

yarn start

application이 정상적으로 실행되면 아래와 같은 로그를 확인할 수 있습니다.


Entity 생성

위에서 typeorm 설정 파일의 entity 파일 위치를 아래와 같이 설정했습니다.

ENTITIES: [__dirname + '/domain/*.entity{.ts,.js}'],

따라서 src/domain이라는 폴더를 만들고 entity 파일들을 만들면 됩니다.


/src/domain/user.entity.ts 를 아래와 같이 만듭니다.

import { Column, Entity, PrimaryGeneratedColumn, OneToMany } from 'typeorm';
import {UserAuthority} from "./user-authority.entity";

@Entity('user', { schema: 'slider' })
export class User {
    @PrimaryGeneratedColumn({ type: 'int', name: 'id' })
    id: number;

    @Column('varchar', { name: 'kakao_id', length: 45 })
    kakaoId: string;

    @Column('varchar', { name: 'email', length: 100 })
    email: string;

    @Column('varchar', { name: 'name', nullable: true, length: 45 })
    name: string | null;

    @Column('varchar', { name: 'gender', length: 10 })
    gender: string;

    @Column('varchar', { name: 'phone', length: 20 })
    phone: string;

    @Column('varchar', { name: 'birth', length: 10 })
    birth: string;

    @Column('varchar', { name: 'profile_image', nullable: true, length: 200 })
    profileImage: string | null;

    @Column('timestamp', {
        name: 'created_at',
        nullable: true,
        default: () => 'CURRENT_TIMESTAMP',
    })
    createdAt: Date | null;

    @Column('timestamp', {
        name: 'updated_at',
        nullable: true,
        default: () => 'CURRENT_TIMESTAMP',
    })
    updatedAt: Date | null;

    @OneToMany(() => UserAuthority, (userAuthority) => userAuthority.user, {
        eager: true,
    })
    authorities?: any[];
}

/src/domain/user-authority.entity.ts를 다음과 같이 만듭니다.

import {
  Column,
  Entity,
  JoinColumn,
  ManyToOne,
  PrimaryGeneratedColumn,
} from 'typeorm';
import { User } from './user.entity';

@Entity('user_authority')
export class UserAuthority {
  @PrimaryGeneratedColumn()
  id: number;

  @Column('int', { name: 'user_id' })
  userId: number;

  @Column('varchar',{name: 'authority_name'})
  authorityName: string;

  @ManyToOne(() => User, (user) => user.authorities)
  @JoinColumn({ name: 'user_id', referencedColumnName: 'id' })
  user: User;
}


테이블 자동 생성

orm.config.ts 파일에서 syncronize를 true로 변경합니다.

SYNCRONIZE: true,


Application을 실행합니다.

yarn start

MySQL에 테이블이 생성된 것을 확인할 수 있습니다.


이상으로 TypeORM 설정이 완료되었습니다.

반응형
반응형

다음은 이 글의 동영상 강좌입니다.

https://youtu.be/9KbnFR_1_Jg


nest project 생성(Backend)

nestjs.com에 가시면 프로젝트 생성하는 법을 확인할 수 있습니다.

https://docs.nestjs.com/first-steps

- project명은 slider-api로 생성합니다.

nest new slider-api


nuxt project 생성(Frontend)

nuxt.org에 가시면 프로젝트 생성하는 법을 확인할 수 있습니다.

https://nuxtjs.org/docs/get-started/installation


Installation

Here, you will find information on setting up and running a Nuxt project in 4 steps.

nuxtjs.org

- project명은 slider-front로 생성합니다.

- yarn create nuxt-app <project-name> 을 사용합니다.


yarn create nuxt-app slider-front


Repository 생성

github.com에 접속해서 Repository를 생성합니다.

  • github.com -> Repositories -> New를 선택합니다.
  • Backend Repository는 slider-api로 생성합니다.
  • Frontend Repository는 slider-front로 생성합니다.

.gitignore 파일 생성

  • 두개 프로젝트의 root 폴더에 .gitignore 파일을 생성합니다.
  • 이 파일은 git 서버에 올라가지 않아도 되는 파일들을 작성해줍니다.
/node_modules
/dist

.DS_Store
.idea

yarn.lock


Repository 연결

  • github desktop을 이용해서 소스를 clone합니다.
  • clone한 소스에 생성한 프로젝트 소스를 이동합니다.
  • 소스를 commit하고 push 합니다.


반응형
반응형

그동안 배웠던 내용들을 이용해서 사이트를 만드는 강좌를 진행합니다.

제목은 Nodejs와 Vuejs로 사이트 만들기 입니다.


이 글의 동영상 강좌입니다.

https://youtu.be/9RBeK3U8Z5Y

개발 스펙은 다음과 같습니다.

  • Backend는Nodejs (Nestjs 프레임워크를 사용합니다. TypeORM을 통해 DB를 연동합니다.)
  • Frontend는 Vuejs (Nuxtjs 프레임워크를 사용합니다.)
  • Database는 MySQL을 사용합니다. (MySQL Workbench의 Model 기능을 사용합니다.)

인프라는 다음과 같이 구성합니다.

  • Version Control(코드 저장소)은 Github을 사용합니다.
  • Production(운영) Server는 AWS의 EC2를 사용합니다.
  • Image가 배포될 Server는 AWS의 S3를 사용합니다.

기타

  • 배포는 Github Actions를 이용해서 자동배포가 되도록 구성을 합니다.
  • 로그인 및 회원 가입은 카카오 로그인을 이용해서 처리합니다.

기능

  • 사이트의 첫화면에 Slideshow가 나타나며 자동 스크롤이 됩니다.
  • 이 이미지는 관리자를 통해 관리되도록 합니다.

사이트를 직접 만들면서 각종 기술들이 어떻게 쓰이는지를 알아 갈 수 있도록 하는것이 이 강좌의 목적입니다.

많이 기대해주세요^^

반응형
반응형

이 글은 아래 동영상 강의로 제공됩니다.


이번엔 Nestjs로 백엔드 개발을 진행합니다.


전체적인 진행 순서는 다음과 같습니다.

  1. kakao developer에서 애플리케이션 생성
  2. 전체 Workflow 이해하기
  3. Nuxtjs(Frontend) 개발
  4. Nestjs(Backend) 개발


아래 명령으로 프로젝트를 생성합니다.

nest new kakao-login-back

- package manager : yarn


axios package를 추가합니다.

yarn add axios

server port를 3001로 바꿔줍니다.

src/main.ts

await app.listen(3001);


src/app.controller에 login api를 만듭니다.

@Post('/login')
  async login(@Body() body: any, @Response() res): Promise<any> {
    try {
      // 카카오 토큰 조회 후 계정 정보 가져오기
      const { code, domain } = body;
      if (!code || !domain) {
        throw new BadRequestException('카카오 정보가 없습니다.');
      }
      const kakao = await this.appService.kakaoLogin({ code, domain });

      console.log(`kakaoUserInfo : ${JSON.stringify(kakao)}`);
      if (!kakao.id) {
        throw new BadRequestException('카카오 정보가 없습니다.');
      }

      res.send({
        user: kakao,
        message: 'success',
      });
    } catch (e) {
      console.log(e);
      throw new UnauthorizedException();
    }
  }

src/app.service.ts에 다음 내용을 추가합니다.

async kakaoLogin(options: { code: string; domain: string }): Promise<any> {
    const { code, domain } = options;
    const kakaoKey = '87073966cb41...';
    const kakaoTokenUrl = 'https://kauth.kakao.com/oauth/token';
    const kakaoUserInfoUrl = 'https://kapi.kakao.com/v2/user/me';
    const body = {
      grant_type: 'authorization_code',
      client_id: kakaoKey,
      redirect_uri: `${domain}/kakao-callback`,
      code,
    };
    const headers = {
      'Content-Type': 'application/x-www-form-urlencoded;charset=utf-8',
    };
    try {
      const response = await axios({
        method: 'POST',
        url: kakaoTokenUrl,
        timeout: 30000,
        headers,
        data: qs.stringify(body),
      });
      if (response.status === 200) {
        console.log(`kakaoToken : ${JSON.stringify(response.data)}`);
        // Token 을 가져왔을 경우 사용자 정보 조회
        const headerUserInfo = {
          'Content-Type': 'application/x-www-form-urlencoded;charset=utf-8',
          Authorization: 'Bearer ' + response.data.access_token,
        };
        console.log(`url : ${kakaoTokenUrl}`);
        console.log(`headers : ${JSON.stringify(headerUserInfo)}`);
        const responseUserInfo = await axios({
          method: 'GET',
          url: kakaoUserInfoUrl,
          timeout: 30000,
          headers: headerUserInfo,
        });
        console.log(`responseUserInfo.status : ${responseUserInfo.status}`);
        if (responseUserInfo.status === 200) {
          console.log(
            `kakaoUserInfo : ${JSON.stringify(responseUserInfo.data)}`,
          );
          return responseUserInfo.data;
        } else {
          throw new UnauthorizedException();
        }
      } else {
        throw new UnauthorizedException();
      }
    } catch (error) {
      console.log(error);
      throw new UnauthorizedException();
    }
  }

서버를 실행합니다.

yarn start:dev

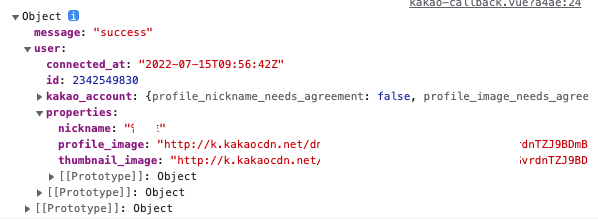
브라우저의 콘솔 로그에 사용자 정보가 리턴된것을 확인할 수 있습니다.

이상으로 카카오로그인을 RestAPI를 이용하여 처리하는 방법에 대해 알아보았습니다.

반응형
반응형

이 글은 아래 동영상 강의로 제공됩니다.


Frontend 개발은 Nuxtjs를 이용하여 진행하도록 합니다.


전체적인 진행 순서는 다음과 같습니다.

  1. kakao developer에서 애플리케이션 생성
  2. 전체 Workflow 이해하기
  3. Nuxtjs(Frontend) 개발
  4. Nestjs(Backend) 개발


우선 아래 명령으로 Nuxt 프로젝트를 생성합니다.

npx create-nuxt-app kakao-login-front

- 프로젝트 명 : kakao-login-front

- programing language : Javascript

- Package manager : Yarn

- UI framework : None

- Nuxt.js modules : Axios

- Linting tools : ESLint

- Testing framework : None

- Rendering mode : Single Page App

- Server : Node.js

- Development tools : Enter

- Continuous integration : None

- Version control system : None


프로젝트 생성이 완료되면 아래와 같은 메시지가 나옵니다.

에디터에서 프로젝트를 열고, yarn dev를 사용해서 프로젝트를 실행합니다.

브라우저에서 http://localhost:3000번을 입력합니다.

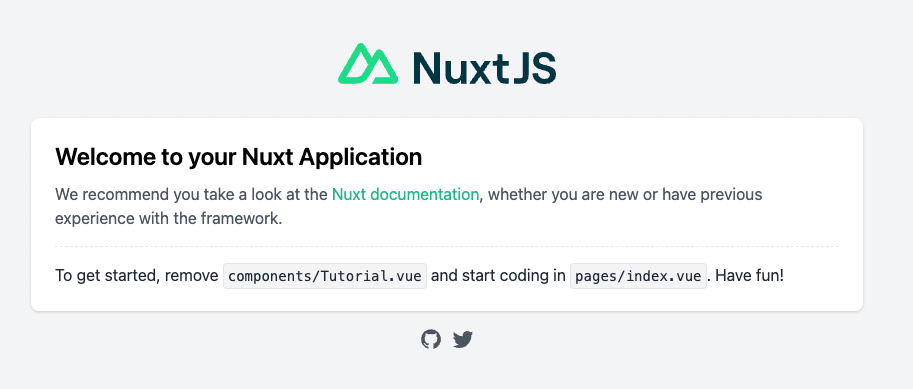
이때 아래와 같은 페이지가 나오면 프로젝트가 정상적으로 만들어진 것입니다.


카카오 로그인 기능을 만들기 위해 아래와 같은 버튼이미지가 필요합니다.

아래 사이트에서 다운로드 하실 수 있습니다.

https://developers.kakao.com/tool/resource/login


Kakao Developers

카카오 API를 활용하여 다양한 어플리케이션을 개발해보세요. 카카오 로그인, 메시지 보내기, 친구 API, 인공지능 API 등을 제공합니다.

developers.kakao.com

이미지를 static 폴더 아래에 copy합니다.


카카오로그인을 사용하기 위해서 kakao.js 파일이 필요합니다.
nuxt.config.js의 'head' 아래에 다음 코드를 추가합니다.

script: [
  {
    src: 'https://developers.kakao.com/sdk/js/kakao.js'
  }
]


pages/index.vue 파일에 카카오 로그인 버튼을 추가하고 로그인 method를 작성 합니다.

<template>
  <a @click="loginWithKakao">
    <img src="/kakao_login_large_narrow.png"/>
  </a>
</template>

<script>
export default {
  name: 'IndexPage',
  methods: {
    kakaoInit () {
      Kakao.init('329a6a74...')// KaKao client key
      Kakao.isInitialized()
    },
    async loginWithKakao () {
      await Kakao.Auth.authorize({
        redirectUri: `${window.location.origin}/kakao-callback`
      })
    }
  },
  mounted () {
    this.kakaoInit()
  }
}
</script>

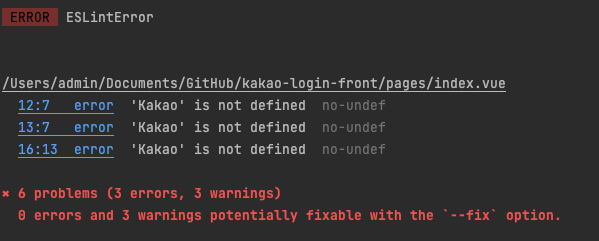
다음과 같이 컴파일 오류가 발생할 수 있습니다.

이 경우 .eslintrc.js 파일을 열고 아래 내용을 추가하면 오류를 해결 할 수 있습니다.

'Kakao' 변수가 선언되지 않았다는 오류이고, 선언되지 않은 변수를 eslint에서 인식할 수 있도록 해 준것입니다.

  globals: {
    Kakao: true
  }

카카오 인증 후 callback 페이지를 아래와 같이 만듭니다.

axios를 이용해 서버API를 호출할 것이기 때문에 nuxt.config.js 다음을 추가합니다.

- baseURL은 서버의 주소를 지정합니다.

  modules: [
    '@nuxtjs/axios'
  ],

  axios: {
    baseURL: 'http://localhost:3001/'
  },


pages/kakao-callback.vue

<template>
  <div>
    로그인 중 입니다...
  </div>
</template>

<script>
export default {
  async mounted () {
    try {
      // code 유무 체크
      if (!this.$route.query.code) {
        return this.$router.push('/')
      }
      console.log(`code : ${this.$route.query.code}`)

      // 카카오 로그인 요청
      const body = {
        code: this.$route.query.code,
        domain: window.location.origin
      }
      const response = await this.$axios.$post(
        '/login', body, {}
      )
      console.log(response)
    } catch (error) {
      console.log(error)
    }
  }
}
</script>

브라우저에서 확인을 해봅니다.

확인하고 계속하기를 클릭하면 아래와 같은 화면이 보입니다.

브라우저의 콘솔을 확인해보면 다음과 같이 code 값이 넘어온것을 확인 할 수 있습니다.

이렇게 해서 frontend 작업이 완료되었습니다.

다음시간은 backend 작업을 진행해보겠습니다.

반응형

+ Recent posts