이번 시간은 JWT 인증 기능을 추가해 보겠습니다.
다음은 이 강의의 동영상입니다.
JWT에 관한 자세한 사항은 제가 이전에 작성한 글을 참조해 주세요.
https://codegear.tistory.com/72
[Nodejs 프레임워크]NestJS - 12. JWT 토큰 생성
다음은 이글의 동영상 강의 입니다. https://youtu.be/H4VS-Osylvo 토큰을 이용한 API 호출 방법 REST API 호출시 토큰을 이용하면 사용자 인증과 권한을 체크할 수 있습니다. 다음 그림은 토큰의 생성과 호
codegear.tistory.com
JWT 관련 패키지 추가
jwt 인증을 위해서는 다음과 같은 패키지가 필요합니다.
- @nestjs/jwt
- @nestjs/passport
- passport
- passport-jwt
아래와 같이 패키지를 추가합니다.
yarn add @nestjs/jwt @nestjs/passport passport passport-jwt
Payload 인터페이스 생성
jwt인증시엔 payload interface가 필요합니다.
아래와 같이 같이 Payload interface를 만듭니다.(참조 : https://jwt.io/)
/src/auth/security/payload.interface.ts
export interface Payload {
    id: number;
    name: string;
    authorities?: any[];
}
JwtStrategy 를 아래와 같이 작성합니다.
/src/auth/security/passport.jwt.stategy.ts
import { Injectable, UnauthorizedException } from "@nestjs/common";
import { PassportStrategy } from "@nestjs/passport";
import { ExtractJwt, Strategy } from "passport-jwt";
import { AuthService } from "../auth.service";

@Injectable()
export class JwtStrategy extends PassportStrategy(Strategy){
    constructor(private authService: AuthService){
        super({
            jwtFromRequest: ExtractJwt.fromAuthHeaderAsBearerToken(),
            ignoreExpiration: true,
            secretOrKey: process.env.JWT_SECRET
        })
    }
}
로그인 및 회원 가입
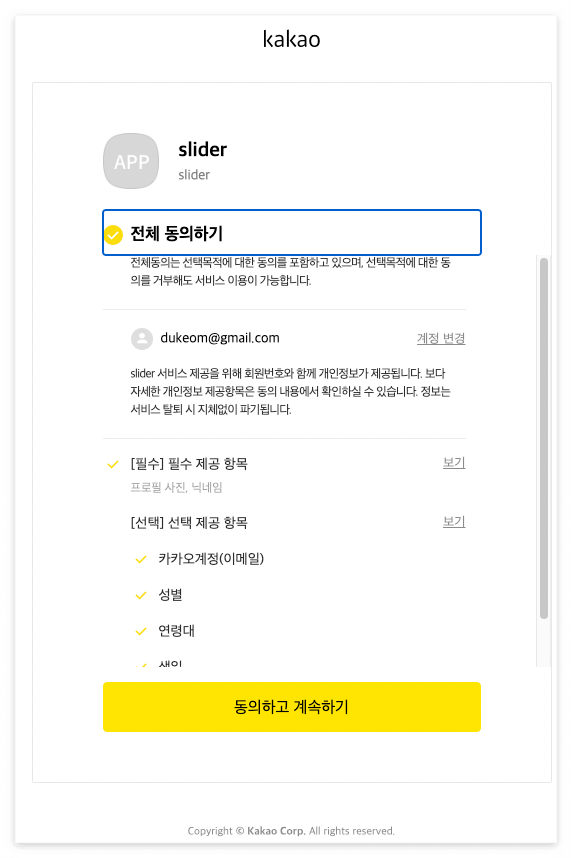
카카오 로그인 후에 회원 로그인 및 회원 가입을 처리합니다.
- 회원 데이터가 없을 경우는 회원 가입을 처리합니다.
- 회원 데이터가 있을 경우는 로그인 처리를 합니다.
우선 auth.controller에서 카카오 로그인을 한 후 다음 코드를 추가합니다.
/src/auth/auth.controller.ts
			console.log(`kakaoUserInfo : ${JSON.stringify(kakao)}`);
            if (!kakao.id) {
                throw new BadRequestException('카카오 로그인 실패!');
            }

            // 로그인 처리 - 회원 가입이 안되어 있을 경우 가입 처리
            const jwt =  await this.authService.login(kakao);
            console.log(`jwt.accessToken : ${jwt.accessToken}`);
            res.send({
                accessToken: jwt.accessToken,
                message: 'success'
            });
authService에서 고객을 조회하고, 로그인을 처리합니다.
/src/auth/auth.service.ts
async login(kakao): Promise<{accessToken: string} | undefined> {
let userFind: User = await this.userService.findByFields({
where: { kakaoId: kakao.id }
});
if(!userFind) {
isFirstLogin = true;
// 회원 가입
const user = new User();
user.kakaoId = kakao.id;
user.email = kakao.kakao_account.email;
user.name = kakao.kakao_account.name;
userFind = await this.registerUser(user);
}
const payload: Payload = {
id: userFind.id,
name: userFind.name,
authorities: userFind.authorities
};
return {
accessToken: this.jwtService.sign(payload)
};
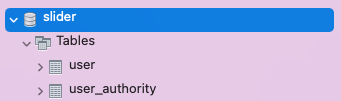
}userService에 findByFields, registerUser를 추가합니다.
/src/auth/user.service.ts
   constructor(
        @InjectRepository(User)
        private userRepository: Repository<User>,
        @InjectRepository(UserAuthority)
        private userAuthorityRepository: Repository<UserAuthority>,
    ){}

    async findByFields(options: FindOneOptions<User>): Promise<User | undefined> {
        return await this.userRepository.findOne(options);
    }

    async registerUser(newUser: User): Promise<User> {
        let userFind: User = await this.findByFields({
            where: { kakaoId: newUser.kakaoId }
        });
        if(userFind) {
            throw new HttpException('Username aleady used!', HttpStatus.BAD_REQUEST);
        }
        const registeredUser = await this.userService.save(newUser);
        if(registeredUser){
            await this.saveAuthority(registeredUser.id);
        }else {
            throw new HttpException('Username register error!', HttpStatus.INTERNAL_SERVER_ERROR);
        }

        return registeredUser;
    }

    async save(user: User): Promise<User | undefined> {
        return await this.userRepository.save(user);
    }

    async saveAuthority(userId: number): Promise<UserAuthority | undefined> {
        let userAuth = new UserAuthority();
        userAuth.userId = userId;
        userAuth.authorityName = RoleType.USER;
        return await this.userAuthorityRepository.save(userAuth);
    }
권한 Type을 선언한 RoleType을 만들어줍니다.
/src/auth/role-type.ts
export enum RoleType {
    USER = 'ROLE_USER',
    ADMIN = 'ROLE_ADMIN',
}
auth.module에 jwtModule을 추가하고 import 합니다.
/src/auth/auth.module.ts
import { JwtModule } from '@nestjs/jwt';
import { JwtStrategy } from './security/passport.jwt.strategy';
...
@Module({
  imports: [
    TypeOrmModule.forFeature([User]),
    JwtModule.register({
      secret: process.env.JWT_SECRET,
      signOptions: {expiresIn: '300s'},
    }),
    PassportModule
  ],
  exports: [TypeOrmModule, UserService],
  controllers: [AuthController],
  providers: [AuthService, UserService, JwtStrategy]
})
export class AuthModule {}
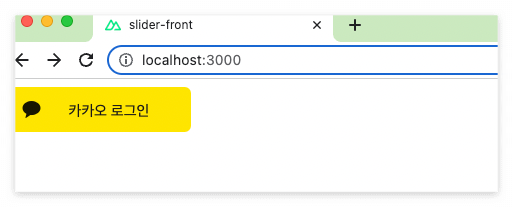
프론트에서 로그인을 하면 브라우저의 콘솔에서 아래와 같이 jwt token을 확인할 수 있습니다.

'Nestjs 활용 동영상강좌' 카테고리의 다른 글
| (풀스택) Node(Nest)와 Vue(Nuxt)로 사이트 만들기 - 09.Front에서 S3에 파일 업로드하기 (0) | 2022.10.23 |
|---|---|
| (풀스택) Node(Nest)와 Vue(Nuxt)로 사이트 만들기 - 08.AWS S3 설정 (0) | 2022.10.22 |
| (풀스택) Node(Nest)와 Vue(Nuxt)로 사이트 만들기 - 07.사용자 권한 관리 (0) | 2022.10.15 |
| (풀스택) Node(Nest)와 Vue(Nuxt)로 사이트 만들기 - 06.Front 로그인 (with Jwt Token) (0) | 2022.10.03 |
| (풀스택) Node(Nest)와 Vue(Nuxt)로 사이트 만들기 - 04.카카오 로그인 (2) | 2022.09.24 |
| (풀스택) Node(Nest)와 Vue(Nuxt)로 사이트 만들기 - 03.TypeORM 설정 (0) | 2022.09.13 |
| (풀스택) Node(Nest)와 Vue(Nuxt)로 사이트 만들기 - 02.프로젝트 생성 및 Repository 연결 (0) | 2022.09.12 |
| (풀스택) Node(Nest)와 Vue(Nuxt)로 사이트 만들기 - 01.강좌 소개 (0) | 2022.09.11 |