반응형

Flutter 개발 환경 설정에 대해 알아봅니다.

이 글은 Flutter 공식 홈페이지의 Get Started 문서를 참조하였습니다.

https://docs.flutter.dev/get-started/install


Choose your development platform to get started

Install Flutter and get started. Downloads available for Windows, macOS, Linux, and ChromeOS operating systems.

docs.flutter.dev

플랫폼 선택

환경에 맞게 선택하시면 됩니다.
저는 맥을 선택하였습니다.


Type of app

다음으로는 어떤 종류의 앱을 만들 것인지를 선택해야 합니다.

저는 iOS를 선택하였습니다.

Software 설치

  • Apple Sillicon을 사용하는 Mac일 경우 Rosetta 2 translation process를 설치해야 합니다.
    • Mac에서 intel 기반의 app을 실행할 때 필요한 유틸리티입니다.
sudo softwareupdate --install-rosetta --agree-to-license
 

Xcode - Apple Developer

Xcode includes everything you need to develop, test, and distribute apps across all Apple platforms.

developer.apple.com

  • CocoaPods 설치
    • Native앱에 Flutter plugin 컴파일이 가능하도록 CocoaPods을 설치합니다. 
    • https://cocoapods.org/
 

CocoaPods.org

CocoaPods is built with Ruby and is installable with the default Ruby available on macOS. We recommend you use the default ruby. Using the default Ruby install can require you to use sudo when installing gems. Further installation instructions are in the g

cocoapods.org

  • 아래 명령어를 사용하여 cocoapods를 설치합니다
sudo gem install cocoapods
  • cocoapods 설치시 다음과 같은 오류가 발생할 수 있습니다.
ERROR:  Error installing cocoapods:
	ERROR: Failed to build gem native extension.
  • 이때는 xcode-select를 인스톨 하면 됩니다.
    • xcode-select는 XCode의 명령줄 관리 도구입니다.
xcode-select --install
  • 간혹 xcode-select도 아래와 같이 설치가 안될 경우가 있습니다.
xcode-select: note: Command line tools are already installed. 
Use "Software Update" in System Settings or the softwareupdate 
command line interface to install updates
  • 이때는 software update를 download 하여 설치하면 해결 할 수 있습니다.
    • software update는 운영 체제와 관련된 모든 소프트웨어 업데이트를 자동으로 설치하는 기능을 수행합니다.
    • 따라서 다운로드 및 설치 시간이 좀 많이 소요됩니다.
softwareupdate --install -a
  • 다운로드가 완료되면 "시스템 설정"에 업데이트가 표시되고, 업데이트를 클릭 하시면됩니다.
    • 업데이트가 완료되면 다시 CocoaPods를 설치합니다.
sudo gem install cocoapods
  • 설치가 완료되면 다음과 같이 메시지가 표시됩니다.


Text Editor Settings

  • Text editor는 Visual Studio Code, Android Studio, IntelliJ IDEA등을 사용할 수 있습니다.
  • 저는 Visual Studio Code를 선택하였습니다.
  • Visual Studio Code를 설치하고, 실행합니다.
  • 아래 링크에 있는 Dart Extention을 추가합니다.
  • https://marketplace.visualstudio.com/items?itemName=Dart-Code.flutter
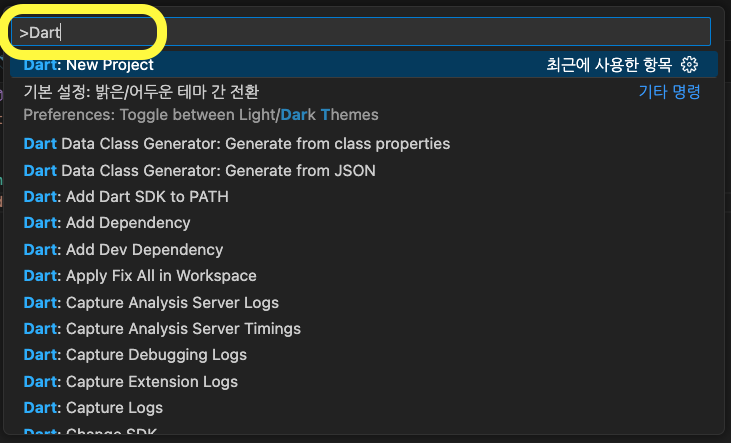
  • Command Palette를 실행합니다. 단축키는 Command+Shift+P 입니다.
  • Command Palette에서 "flutter"를 입력합니다.

  • "Flutter:New Project"를 선택합니다.
  • 이때 Flutter SDK가 설치 되어 있지 않으면 다운로드하여 설치하시면됩니다.
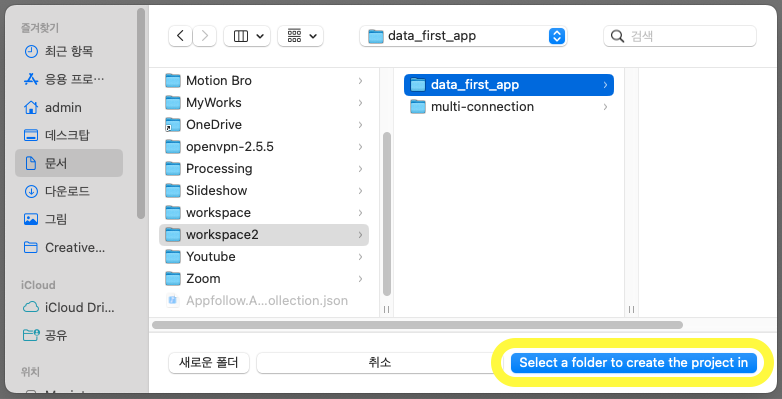
  • 설치가 되어 있다면 위치를 지정해주면 됩니다.
  • SDK 설치 후에 Command Palette에서 "Flutter:New Project"를 선택하고 "flutter-first" 라는 프로젝트를 생성합니다.

iOS 개발환경 설정

  • XCode를 설치합니다.
  • XCode의 버전에 맞는 command line tool을 설치합니다.
sudo sh -c 'xcode-select -s /Applications/Xcode.app/Contents/Developer && xcodebuild -runFirstLaunch'
  • XCode license에 동의 서명을 합니다.
sudo xcodebuild -license


iOS Simulator 설치

  • iOS Simulator를 설치합니다.
xcodebuild -downloadPlatform iOS
  • Simulator를 실행합니다
open -a Simulator
  • XCode를 실행합니다.
  • 메뉴에서 Windows - Devices and Simulators를 선택합니다.
  • simulator 탭을 클릭하면 사용 가능한 리스트가 나옵니다.

  • XCode에서 flutter_first 프로젝트를 엽니다.

  • 탐색 창에서 flutter_first 프로젝트 아래 있는 ios를 선택하면 됩니다.

  • XCode 상단의 파란색 실행 버튼을 클릭합니다.

  • 아래와 같이 simulator가 실행됩니다.


반응형

'Flutter' 카테고리의 다른 글

Dart로 Hello World 출력하기  (0) 2024.10.01
Dart Language 소개  (1) 2024.09.23
반응형

이전 post 에서 Multiple database connection 설정 방법에 대해서 알아보았습니다.

@InjectRepository에서 아래와 같이 connection을 명시적으로 작성을 해주었습니다.

@InjectRepository(Slider, 'sliderConnection')
private sliderRepository: Repository<Slider>


그런데 @InjectDataSource()를 사용시에는 database schema를 찾지 못하는 문제가 발생합니다.

@InjectDataSource()
private dataSource: DataSource


이럴 경우에는 @Entity에 스키마 정보를 명시적으로 작성해주면 됩니다.

@Entity({ name: 'slider', database: 'slider' })


database 에 작성된 slider는 shema name입니다.

반응형
반응형

AWS Code Pipeline을 사용해서 Build시 다음과 같은 오류가 발생하는 경우가 있습니다.

FATAL ERROR: Ineffective mark-compacts near heap limit Allocation failed 
- JavaScript heap out of memory


문제 해결을 위해 검색을 해보면 대부분 아래와 같이 heap memory 옵션을 추가하라고 나옵니다.

export NODE_OPTIONS="--max-old-space-size=8192"


하지만 이 옵션의 경우 AWS 빌드 컨테이너의 메모리 사이즈가 이것보다 클 경우만 사용 가능한 옵션입니다.

즉, 기본적으로 빌드 컨테이너의 메모리가 부족하면 이것을 늘려도 소용이 없다는 뜻입니다.


이 경우 빌드 컨테이너의 메모리를 늘려서 문제를 해결할 수 있습니다.

AWS 콘솔에서 Code Build - Build Project 메뉴에 들어가서 프로젝트를 선택하면 설정된 메모리를 보실 수 있습니다.

편집 버튼을 클릭하면 메모리 사이즈를 변경할 수 있습니다.

반응형
반응형

https://youtu.be/k7UtpY7uqDE


Application을 개발시 여러개의 DB에 접속하여 데이터를 핸들링 해야 하는 경우가 있습니다.
Nestjs에서는 TypeORM의 Multiple Connection을 이용하여 이러한 구현이 가능합니다.

예제에서는 다음과 같이 두개의 database를 사용합니다.

  • Database #1 : cat
  • Database #2 : slider

Table 정보

사용하는 테이블 생성 정보는 다음과 같습니다.

cat

CREATE TABLE `cat` (
  `id` int(11) NOT NULL AUTO_INCREMENT,
  `name` varchar(255) NOT NULL COMMENT '고양이 이름',
  `age` int(11) NOT NULL COMMENT '고양이 나이',
  `breed` varchar(255) NOT NULL COMMENT '고양이 종류',
  PRIMARY KEY (`id`)
);

slider

CREATE TABLE `slider` (
  `id` int(11) NOT NULL AUTO_INCREMENT,
  `image_url` varchar(200) NOT NULL,
  `created_at` timestamp NOT NULL DEFAULT CURRENT_TIMESTAMP,
  `updated_at` timestamp NOT NULL DEFAULT CURRENT_TIMESTAMP,
  PRIMARY KEY (`id`)
);


프로젝트 생성

아래와 같이 프로젝트를 생성합니다.

nest new multi-connection


폴더로 이동 후 Visual Studio Code를 실행합니다.

cd multi-connection
code .

패키지 설치

아래와 같이 TypeORM 패키지를 설치합니다.

yarn add @nestjs/typeorm typeorm mysql2


첫번째 database 연결하기

ORM 설정파일

프로젝트에 orm 환경 설정 파일을 만듭니다.

  • 소스 폴더 : src/config/orm.config.ts
import { TypeOrmModuleOptions } from "@nestjs/typeorm";

function ormConfig(): TypeOrmModuleOptions {
    return {
        name: 'default',
        type: 'mysql',
        database: 'cat',
        host: 'localhost',
        port: Number(13306),
        username: 'cat',
        password: 'cat',
        logging: (process.env.NODE_ENV === 'local'),
        synchronize: true,
        entities: [__dirname + '/domain/*.entity.{ts,js}'],
        migrations: [__dirname + '/migrations/**/*.{ts,js}'],
        migrationsRun: false,
    };
}
function ormConfigSlider(): TypeOrmModuleOptions {
    return {
        name: 'sliderConnection',
        type: 'mysql',
        database: 'slider',
        host: 'localhost',
        port: Number(13306),
        username: 'slider',
        password: 'slider',
        logging: (process.env.NODE_ENV === 'local'),
        synchronize: true,
        entities: [__dirname + '/domain/*.entity.{ts,js}'],
        migrations: [__dirname + '/migrations/**/*.{ts,js}'],
        migrationsRun: true,
    };
}
export { ormConfig, ormConfigSlider };


orm config import 하기

app.module.ts 에 orm config를 import 합니다.

import { ormConfig } from './config/orm.config';

imports: [
    TypeOrmModule.forRootAsync({
      useFactory: ormConfig
    }),
    TypeOrmModule.forRootAsync({
      name: 'sliderConnection',
      useFactory: ormConfigSlider
    })
  ],


Entity 생성

typeorm-model-generator를 사용해서 테이블에 있는 cat, slider entity를 생성합니다.

사용법은 아래 포스트에서 확인하실 수 있습니다.
https://codegear.tistory.com/122


typeorm-model-generator 사용법

TypeORM 사용시 Entity 파일을 자동으로 생성해주는 tool이 있습니다.바로 typeorm-model-generator 입니다.이 tool을 사용하면 테이블을 참조하여 손쉽게 entity 파일을 만들 수 있습니다. typeorm-model-generator에

codegear.tistory.com

typeorm-model-generator -h localhost -d cat -p 13306 -u cat -x cat -e mysql -o ./gen_models
typeorm-model-generator -h localhost -d slider -p 13306 -u slider -x slider -e mysql -o ./gen_models

gen_models 폴더에 생성된 entity 파일을 domain 폴더로 복사합니다.

파일 이름을 아래와 같이 변경합니다.(ormConfig에서 설정한 파일명 형식)

Cat.ts -> Cat.entity.ts
Slider.ts -> Slider.entity.ts

Module에 Entity 선언하기

app.module.ts의 import 아래에 다음을 추가합니다.

(TypeOrmModule.forRootAsync 아래에 추가하면 됩니다)

TypeOrmModule.forFeature([Cat]),
TypeOrmModule.forFeature([Slider], 'sliderConnection')

Cat & Slider 데이터 조회하기

app.controller.ts에 다음을 추가합니다.

@Get('/cats')
async getCats(){
  return await this.appService.getCats();
}

@Get('/sliders')
async getSliders(){
  return await this.appService.getSliders();
}

app.service.ts에 다음을 추가합니다. (getCats, getSliders)

import { Injectable } from '@nestjs/common';
import { InjectRepository } from '@nestjs/typeorm';
import { Repository } from 'typeorm';
import { Cat } from './domain/Cat.entity';
import { Slider } from './domain/Slider.entity';

@Injectable()
export class AppService {
  constructor(
    @InjectRepository(Cat)
    private catRepository: Repository<Cat>,
    @InjectRepository(Slider, 'sliderConnection')
    private sliderRepository: Repository<Slider>
  ){}
  
  getHello(): string {
    return 'Hello World!';
  }
  async getCats() {
    return await this.catRepository.find(); 
  }
  async getSliders() {
    return await this.sliderRepository.find();
  }
}


브라우저에서 다음을 각각 호출합니다.

http://localhost:3000/cats
http://localhost:3000/sliders

결과는 다음과 같습니다.

[
   {
      "id":1,
      "name":"kitty",
      "age":1,
      "breed":"cyprus"
   },
   {
      "id":2,
      "name":"pitty",
      "age":2,
      "breed":"percian"
   }
]
[
   {
      "id":1,
      "imageUrl":"https://..../images/test.jpg",
      "createdAt":"2024-08-19T14:08:20.000Z",
      "updatedAt":"2024-08-19T14:08:20.000Z"
   }
]


이상으로 Nestjs에서 TypeORM을 사용해서 여러개의 DB를 사용하는 방법에 대해 알아보았습니다.

반응형
반응형

https://youtu.be/KwqP314OpxQ


TypeORM 사용시 Entity 파일을 자동으로 생성해주는 tool이 있습니다.
바로 typeorm-model-generator 입니다.

이 tool을 사용하면 테이블을 참조하여 손쉽게 entity 파일을 만들 수 있습니다.


typeorm-model-generator에 대한 자세한 설명은 아래 링크에서 확인하실 수 있습니다.

https://www.npmjs.com/package/typeorm-model-generator


typeorm-model-generator

Generates models for TypeORM from existing databases.. Latest version: 0.4.6, last published: 3 years ago. Start using typeorm-model-generator in your project by running `npm i typeorm-model-generator`. There are 5 other projects in the npm registry using

www.npmjs.com


typeorm-model-generator는 아래와 같이 여러 db engine을 지원합니다.

  • Microsoft SQL Server
  • PostgreSQL
  • MySQL
  • MariaDB
  • Oracle Database
  • SQLite


우선 typeorm-model-generator를 설치합니다.

npm i -g typeorm-model-generator


사용법은 다음과 같습니다.

Usage: typeorm-model-generator -h <host> -d <database> -p [port] -u <user> -x
[password] -e [engine]

Options:
  --help                 Show help                                     [boolean]
  --version              Show version number                           [boolean]
  -h, --host             IP address/Hostname for database server
                                                          [default: "127.0.0.1"]
  -d, --database         Database name(or path for sqlite)            [required]
  -u, --user             Username for database server
  -x, --pass             Password for database server              [default: ""]
  -p, --port             Port number for database server
  -e, --engine           Database engine
          [choices: "mssql", "postgres", "mysql", "mariadb", "oracle", "sqlite"]
                                                              [default: "mssql"]
  -o, --output           Where to place generated models
                            [default: "./output"]
  -s, --schema           Schema name to create model from. Only for mssql
                         and postgres. You can pass multiple values
                         separated by comma eg. -s scheme1,scheme2,scheme3
  --ssl                                               [boolean] [default: false]


예를 들면 다음과 같습니다.

typeorm-model-generator -h localhost -d test -p 3306 -u root -x root -e mysql -o ./generated_models


옵션 사용법은 다음과 같습니다.

  • -h : 테이터베이스 호스트 IP (localhost)
  • -d : 데이터베이스 이름 (test)
  • -p : 데이터베이스 포트 (3306)
  • -u : 데이터베이스 username (root)
  • -x : 데이터베이스 password (root)
  • -e : 데이터베이스 engine (mysql)
  • 마지막은 파일 생성위치입니다(./generated_models)

실행하면 아래와 같이 entity 파일이 생성 됩니다.

  • 폴더 : generated_models/entities/Cat.ts
import { Column, Entity, PrimaryGeneratedColumn } from "typeorm";

@Entity("cat", { schema: "test" })
export class Cat {
  @PrimaryGeneratedColumn({ type: "int", name: "id" })
  id: number;

  @Column("varchar", { name: "name", comment: "고양이 이름", length: 255 })
  name: string;

  @Column("int", { name: "age", comment: "고양이 나이" })
  age: number;

  @Column("varchar", { name: "breed", comment: "고양이 종류", length: 255 })
  breed: string;
}


typeorm-model-generator를 사용해 좀 더 빠르고 편한 개발 생활 되시길 바랍니다. 

반응형

+ Recent posts